









3.4 Ansible常用模块
2015年底270多个模块,2016年达到540个,2018年01月12日有1378个模块,2018年07月15日1852个模块,2019年05月25日(ansible 2.7.10)时2080个模块,2020年03月02日有3387个模块
虽然模块众多,但最常用的模块也就2,30个而已,针对特定业务只用10几个模块
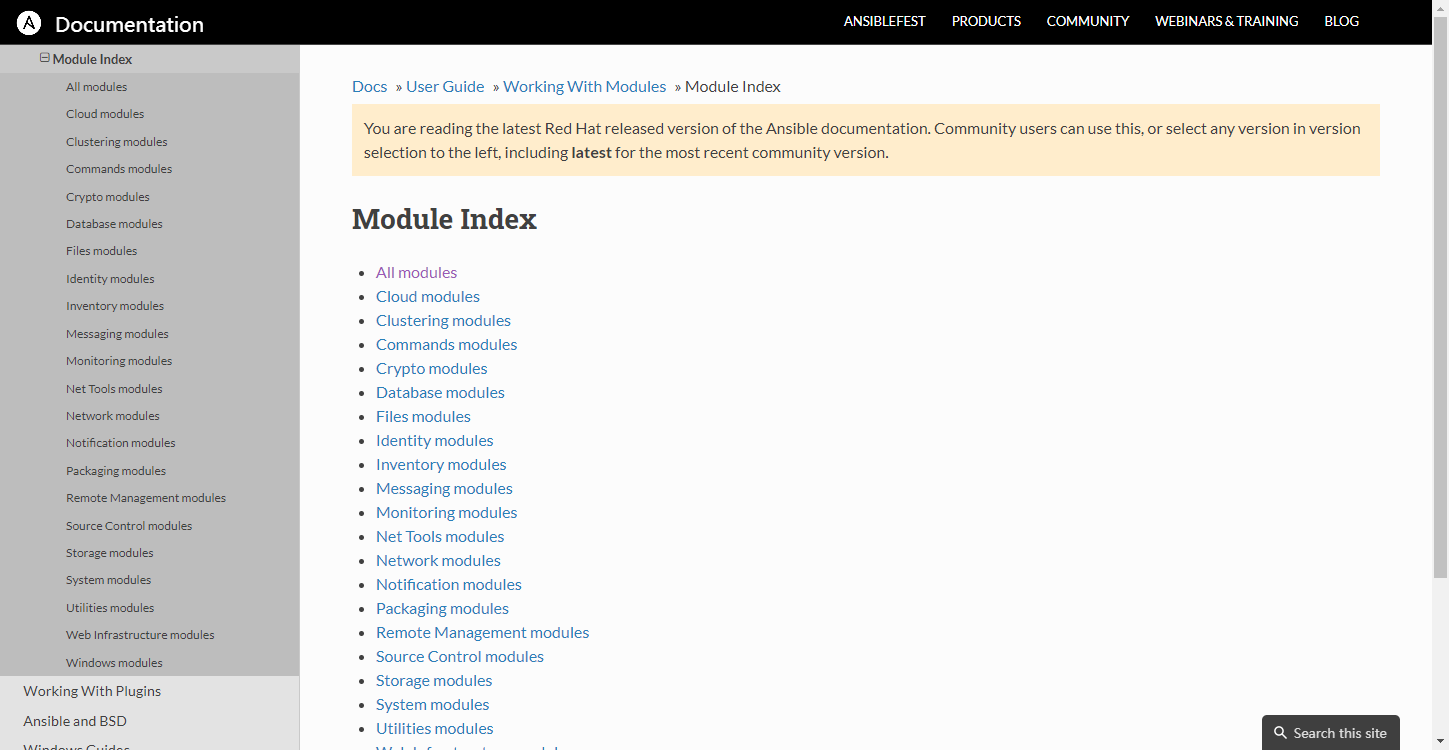
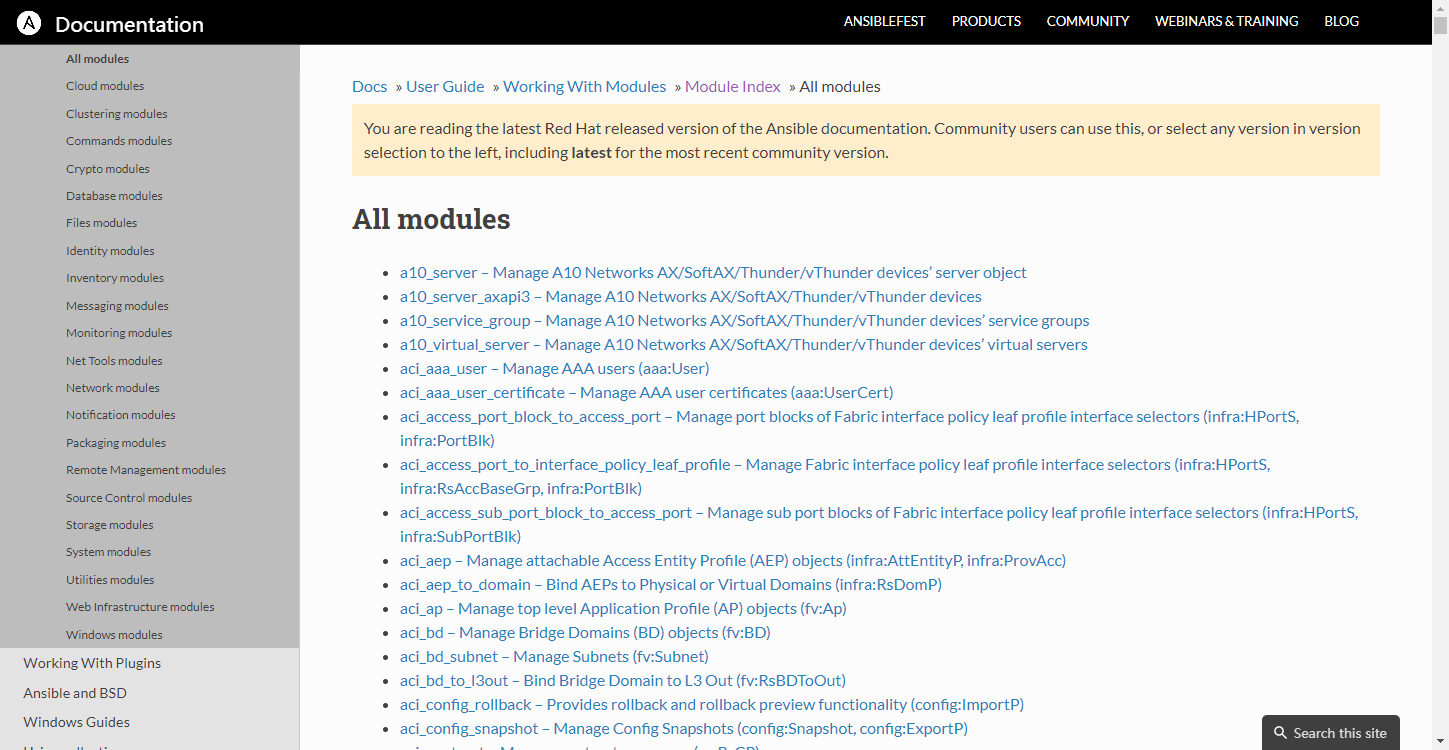
常用模块帮助文档参考:
https://docs.ansible.com/ansible/2.9/modules/modules_by_category.html
https://docs.ansible.com/ansible/2.9/modules/list_of_all_modules.html
https://docs.ansible.com/ansible/latest/modules/list_of_all_modules.html
https://docs.ansible.com/ansible/latest/modules/modules_by_category.html
3.4.1 Command模块
功能:在远程主机执行命令,此为默认模块,可忽略-m选项
注意:此命令不支持$VARNAME < > | ; &等,可以用shell模块实现
[root@ansible ~]# ansible websrvs -m command -a 'chdir=/etc cat centos-release'
10.0.0.6 | CHANGED | rc=0 >>
CentOS release 6.10 (Final)
10.0.0.7 | CHANGED | rc=0 >>
CentOS Linux release 7.9.2009 (Core)

[root@ansible ~]# ansible websrvs -m command -a 'chdir=/data touch f1.txt'
[WARNING]: Consider using the file module with state=touch rather than running 'touch'.
If you need to use command because file is insufficient you can add 'warn: false' to
this command task or set 'command_warnings=False' in ansible.cfg to get rid of this
message.
10.0.0.6 | CHANGED | rc=0 >>

10.0.0.7 | CHANGED | rc=0 >>

[root@ansible ~]# ansible websrvs -m command -a 'ls /data'
10.0.0.6 | CHANGED | rc=0 >>
f1.txt
lost+found
10.0.0.7 | CHANGED | rc=0 >>
f1.txt

# chdir进入目录,create表示如果/data/f1.txt存在,则不执行命令,不存在,就执行
[root@ansible ~]# ansible websrvs -m command -a 'chdir=/etc creates=/data/f1.txt cat centos-release'
10.0.0.6 | CHANGED | rc=0 >>
CentOS release 6.10 (Final)
10.0.0.7 | CHANGED | rc=0 >>
CentOS Linux release 7.9.2009 (Core)

# removes表示文件存在,则执行命令,不存在就不执行
[root@ansible ~]# ansible websrvs -m command -a 'chdir=/etc removes=/data/f1.txt cat centos-release'
10.0.0.6 | SUCCESS | rc=0 >>
skipped, since /data/f1.txt does not exist
10.0.0.7 | SUCCESS | rc=0 >>
skipped, since /data/f1.txt does not exist

ansible websrvs -m command -a 'service vsftpd start'

# command不支持| 所以显示面的话 并不会执行
[root@ansible ~]# ansible websrvs -m command -a 'echo waluna|passwd --stdin luna'
10.0.0.6 | CHANGED | rc=0 >>
waluna|passwd --stdin luna
10.0.0.7 | CHANGED | rc=0 >>
waluna|passwd --stdin luna

# 真会删除
[root@ansible ~]# ansible websrvs -m command -a 'rm -rf /data/'
[WARNING]: Consider using the file module with state=absent rather than running 'rm'.
If you need to use command because file is insufficient you can add 'warn: false' to
this command task or set 'command_warnings=False' in ansible.cfg to get rid of this
message.
10.0.0.6 | FAILED | rc=1 >>
rm: cannot remove `/data': Device or resource busynon-zero return code
10.0.0.7 | FAILED | rc=1 >>
rm: cannot remove ‘/data/’: Device or resource busynon-zero return code

# command不支持> < 所以不成功
[root@ansible ~]# ansible websrvs -m command -a 'echo hello > /data/hello.log'
10.0.0.6 | CHANGED | rc=0 >>
hello > /data/hello.log
10.0.0.7 | CHANGED | rc=0 >>
hello > /data/hello.log

# command不支持变量,所以显示本机的主机名
[root@ansible ~]# ansible websrvs -m command -a "echo $HOSTNAME"
10.0.0.6 | CHANGED | rc=0 >>
ansible
10.0.0.7 | CHANGED | rc=0 >>
ansible
3.4.2 Shel模块
功能:和command相似,用shell执行命令,支持各种符号,比如:*,$,>等
[root@ansible ~]# ansible websrvs -m shell -a 'echo $HOSTNAME'
10.0.0.7 | CHANGED | rc=0 >>
centos7.waluna.top
10.0.0.8 | CHANGED | rc=0 >>
centos8.waluna.top
[root@ansible ~]# ansible websrvs -m shell -a 'echo waluna | passwd --stdin test'
10.0.0.7 | CHANGED | rc=0 >>
Changing password for user test.
passwd: all authentication tokens updated successfully.
10.0.0.8 | CHANGED | rc=0 >>
Changing password for user test.
passwd: all authentication tokens updated successfully.
[root@ansible ~]# ansible websrvs -m shell -a 'echo hello > /data/hello.log'
10.0.0.7 | CHANGED | rc=0 >>

10.0.0.8 | CHANGED | rc=0 >>

[root@ansible ~]# ansible websrvs -m shell -a 'cat /data/hello.log'
10.0.0.7 | CHANGED | rc=0 >>
hello
10.0.0.8 | CHANGED | rc=0 >>
hello
注意:调用bash执行命令类似cat /tmp/test.md | awk -F '|' '(print $1,$2}' &> /tmp/example.txt这些复杂命令,即使使用shell也可能会失败,解决办法:写到脚本里,copy到远程,执行,再把需要的结果拉回执行命令的机器
将shell模块代替command,设为默认模块
[root@ansible ~]# vim /etc/ansible/ansible.cfg
module_name = shell
3.4.3 Script模块
功能:在远程主机上运行ansible服务器上的脚本(无需执行权限)
ansible websrvs -m script -a /data/test.sh3.4.4 Copy模块
功能:从ansible服务器主控端复制文件到远程主机
# 如目标存在,默认覆盖,此处指定先备份
ansible websrvs -m copy -a "src=/root/test1.sh dest=/tmp/test2.sh owner=luna mode=600 backup=yes"

# 指定内容,直接生成目标文件
ansible websrvs -m copy -a "content='test line1\ntest line2' dest=/tmp/test.txt"

# 复制/etc目录自身,注意/etc/后面没有/
ansible websrvs -m copy -a "src=/etc dest=/backup"

# 复制/etc/下的文件,不包括/etc/目录自身,注意/etc/后面有/

ansible websrvs -m copy -a "src=/etc/ dest=/backup"
3.4.5 Fetch模块
功能:从远程主机提取文件之ansible的主控端,copy相反,目前不支持目录
ansible websrvs -m fetch -a 'src=/root/test.sh dest=/data/scripts'例:
[root@ansible ~]# ansible all -m fetch -a 'src=/etc/redhat-release dest=/data/os'
[root@ansible ~]# tree /data/os/
/data/os/
├── 10.0.0.6
│   └── etc
│       └── redhat-release
├── 10.0.0.7
│   └── etc
│       └── redhat-release
└── 10.0.0.8
    └── etc
        └── redhat-release

6 directories, 3 file
3.4.6 File模块
功能:设置文件属性吗,创建软连接等
# 创建空文件
ansible all -m file -a 'path=/data/test.txt state=touch'
ansible all -m file -a 'path=/data/test.txt state=absent'
ansible all -m file -a 'path=/root/test.sh state=touch'
ansible all -m file -a "path=/root/test.sh owner=luna mode=755"
ansible all -a 'ls -l /root'  # 不允许使用别名,注意使用别名会报错。
# 创建目录
ansible all -a 'useradd mysql'
ansible all -m file -a "path=/data/mysql state=directory owner=mysql group=mysql"
ansible all -a 'ls -ld /data/mysql'
# 创建软链接
ansible all -m file -a 'src=/data/testfile path|dest|name=/data/testfile-link state=link'
ansible all -m file -a 'src=/root/test.sh name=/root/test-link state=link'
ansible all -a 'ls -l /root'
# 创建目录
ansible all -m file -a 'path=/data/testdir state=directory'
ansible all -a 'ls -ld /data/testdir'
# 递归修改目录属性
ansible all -m file -a "path=/data/mysql state=directory owner=mysql group=mysql recurse=yes"
ansible all -a 'ls -ld /data/mysql'
3.4.7 unarchive模块
功能:解包解压缩
实现有两种用法:
1、将ansible主机上的压缩包传到远程主机后解压缩至特定目录,设置copy=yes
2、将远程主机上的某个压缩包解压缩到指定路径下,设置copy=no
常见参数:
copy:默认为yes,当copy=yes,拷贝的文件是从ansible主机复制到远程主机上,如果设置为copy=no,会在远程主机上寻找src源文件
remote_src:和copy功能一样且互斥,yes表示在远程主机,不在ansible主机,no表示文件在ansible主机上
src:源路径,可以是ansible主机上的路径,也可以是远程主机(被管理端或者第三方主机)上的路径,如果是远程主机上的路径,则需要设置copy=no
dest:远程主机上的目标路径
mode:设置解压缩后的文件权限
例:
ansible all -m unarchive -a 'src=/data/foo.tgz dest=/var/lib/foo owner=luna group=bin'
ansible all -m unarchive -a 'src=/tmp/foo.zip dest=/data copy=no mode=0777'
ansible all -m unarchive -a 'src=https://example.com/example.zip dest=/data copy=no'

ansible websrvs -m unarchive -a 'src=https://releases.ansible.com/ansible/ansible-2.1.6.0-0.1.rc1.tar.gz dest=/data/owner=mysql remote_src=yes'
3.4.8 Archive模块
功能:打包压缩保存在被管理节点、
ansible websrvs -m archive -a 'path=/var/log/ dest=/data/log.tar.bz2 format=bz2 owner=luna mode-0600'3.4.9 Hostname模块
功能:管理主机名
ansible node1 -m hostname -a "name=websrv"
ansible 10.0.0.18 -m hostname -a 'name=node18.waluna.top'
3.4.10 Cron模块
功能:计划任务
支持时间:minute,hour,day,month,weekday
# 备份数据库脚本
[root@centos8 ~]# cat mysql_backup.sh
#!/bin/bash
mysqldump -A -F --single-transaction --master-data=2 -q -uroot|gzip > /data/mysql+`date +%F_%T`.sql.gz

# 创建任务
ansible 10.0.0.8 -m cron -a 'hour=2 minute=30 weekday=1-5 name="backup mysql" job=/root/mysql_backup.sh'
ansible websrvs -m cron -a "minute=*/5 job='/usr/sbin/ntpdate ntp.aliyun.com &> /dev/null' name=Synctime"

# 禁用计划任务
ansible websrvs -m cron -a "minute=*/5 job='/usr/sbin/ntpdate ntp.aliyun.com &> /dev/null' name=synctime disabled=yes"

#启用计划任务
ansible websrvs -m cron -a "minute=*/5 job='/usr/sbin/ntpdate ntp.aliyun.com &> /dev/null' name=synctime disabled=no"

# 删除任务
ansible websrvs -m cron -a "name='backup mysql' state=absent"
ansible websrvs -m cron -a 'state=absent name=Synctime'
3.4.11 Yum和Apt模块
功能:
yum管理软件包,只支持RHEL,Centos,fedora,不支持Ubuntu其它版本
apt模块管理Debian相关版本的软件包
ansible websrvs -m yum -a 'name=httpd state=present'  # 安装
ansible websrvs -m yum -a 'name=httpd state=absent'       # 删除

[root@ansible ~]# ansible websrvs -m yum -a 'name=sl,cowsay'
范例:
[root@ansible ~]# ansible 10.0.0.100 -m apt -a
'name=bb,sl,cowsay,cmatrix,oneko,hollywood,boxes,libaa-bin,x11-apps'
[root@ansible ~]# ansible websrvs -m apt -a 'name=rsync,psmisc state=absent'
3.4.12 Service模块
功能:管理服务
ansible all -m service -a 'name=httpd state=started enabled=yes'
ansible all -m service -a 'name=httpd state=stopped'
ansible all -m service -a 'name=httpd state=reloaded'
ansible all -m shell -a "sed -i 's/^Listen 80/Listen 8080/' /etc/httpd/conf/httpd.conf"
ansible all -m service -a 'name=httpd state=restarted'
3.4.13 User模块
功能:管理用户
# 创建用户
ansible all -m user -a 'name=user1 comment="test user" uid=2048 home=/app/user1 group=root'

ansible all -m user -a 'name=nginx comment=nginx uid=88 group=nginx groups="root, daemon"  shell=/sbin/nologin system=yes create_home=no home=/data/nginx non_unique=yes'

# remove=yes表示删除用户及家目录等数据,默认remove=no
ansible all -m user -a 'name=nginx state=absent remove=yes'
3.4.14 Group模块
功能:管理组
ansible websrvs -m group -a 'name=nginx gid=88 system=yes'    # 创建组
ansible websrvs -m group -a 'name=nginx state=absent"     # 删除组
3.4.15 Lineinfile模块
ansible在使用sed进行替换时,经常会遇到需要转义的问题,而且ansible在遇到特殊符号进行替换时,存在问题,无法正常进行替换。其实在ansible自身提供了两个模块:lineinfile模块和replace模块,可以方便的进行替换
一般在ansible当中去修改某个文件的单行进行替换的时候需要使用lineinfile模块
regexp参数:使用正则表达式匹配对应的行,当替换文本时,如果有多行文本都能被匹配,则只有最后面被匹配到的那行文本才会被替换,当删除文本时,如果有多行文本都能被匹配,这么这些行都会被删除。
如果想进行多行匹配进行替换需要使用replace模块
功能:相当于sed,可以修改文件内容
ansible websrvs -m lineinfile -a "path=/etc/httpd/conf/httpd.conf regexp='^Listen' line='Listen 80'"

ansible all -m lineinfile -a "path=/etc/selinux/config regexp='^SELINUX=' line='SELINUX=disabled'"

ansible all -m lineinfile -a 'dest=/etc/fstab state=absent regexp="^#"'
3.4.16 Replace模块
该模块有点类似于sed命令,主要也是基于正则进行匹配和替换,建议使用
ansible all -m replace -a "path=/etc/fstab regexp='^(UUID.*)' replace='#\1'"
ansible all -m replace -a "path=/etc/fstab regexp='^#(UUID.*)' replace='\1'"
3.4.17 Setup模块
功能:setup模块来收集主机的系统信息,这些facts 信息可以直接以变量的形式使用,但是如果主机较多,会影响执行速度,可以使用gather_facts: no来禁止Ansible收集facts信息
ansible all -m setup
ansible all -m setup -a "filter=ansible_nodename"     # 主机名全称
ansible all -m setup -a "filter=ansible_hostname"     # 主机名
ansible all -m setup -a "filter=ansible_domain"           # 域名
ansible all -m setup -a "filter=ansible_memtotal_mb"  # 内存总大小
ansible all -m setup -a "filter=ansible_memory_mb"        # 内存使用情况
ansible all -m setup -a "filter=ansible_memfree_mb"       # 空闲内存大小
ansible all -m setup -a "filter=ansible_os_family"        # 系统版本家族
ansible all -m setup -a "filter=ansible_distribution_major_version"   # 主版本号
ansible all -m setup -a "filter=ansible_distribution_version"     # 版本号
ansible all -m setup -a "filter=ansible_processor_vcpus"      # CPU核心数
ansible all -m setup -a "filter=ansible_all_ipv4_addresses"       # 所有IPv4地址
ansible all -m setup -a "filter=ansible_architecture" # 系统架构
ansible all -m setup -a "filter=ansible_processor"        # CPU核心
查看python版本
[root@ansible ~]# ansible all -m setup -a 'filter=ansible_python_version'
10.0.0.7 | SUCCESS => {
    "ansible_facts": {
        "ansible_python_version": "2.7.5",
        "discovered_interpreter_python": "/usr/bin/python"
    },
    "changed": false
}
10.0.0.8 | SUCCESS => {
    "ansible_facts": {
        "ansible_python_version": "3.6.8",
        "discovered_interpreter_python": "/usr/libexec/platform-python"
    },
    "changed": false
}
10.0.0.9 | SUCCESS => {
    "ansible_facts": {
        "ansible_python_version": "3.9.5",
        "discovered_interpreter_python": "/usr/bin/python3"
    },
    "changed": false
}
10.0.0.6 | SUCCESS => {
    "ansible_facts": {
        "ansible_python_version": "2.6.6",
        "discovered_interpreter_python": "/usr/bin/python"
    },
    "changed": false
}
取IP地址
# 取所有IPv4地址
[root@ansible ~]# ansible 10.0.0.8 -m setup -a 'filter=ansible_all_ipv4_addresses'
10.0.0.8 | SUCCESS => {
    "ansible_facts": {
        "ansible_all_ipv4_addresses": [
            "10.0.0.8",
            "192.168.0.8",
            "172.16.0.8"
        ],
        "discovered_interpreter_python": "/usr/libexec/platform-python"
    },
    "changed": false
}

# 取默认IP
[root@ansible ~]# ansible 10.0.0.8 -m setup -a 'filter=ansible_default_ipv4'
10.0.0.8 | SUCCESS => {
    "ansible_facts": {
        "ansible_default_ipv4": {
            "address": "10.0.0.8",
            "alias": "eth0",
            "broadcast": "10.0.0.255",
            "gateway": "10.0.0.2",
            "interface": "eth0",
            "macaddress": "00:0c:29:19:bf:73",
            "mtu": 1500,
            "netmask": "255.255.255.0",
            "network": "10.0.0.0",
            "type": "ether"
        },
        "discovered_interpreter_python": "/usr/libexec/platform-python"
    },
    "changed": false
}
Comments | NOTHING