









1 每周的工作日1:30,将/etc备份至/backup目录中,保存的文件名称格式 为“etcbak-yyyy-mm-dd-HH.tar.xz”,其中日期是前一天的时间
[root@centos8 ~]# mkdir /backup
[root@centos8 ~]# crontab -e
30 1 1-5 * * tar cJf /backup/etcbak-`date -d "-1 day" +%F-%H`.tar.xz /etc &> /dev/null

# 注意:打包压缩成xz格式会影响机器性能
2 工作日时间,每10分钟执行一次磁盘空间检查,一旦发现任何分区利用率高于80%,就发送邮件报警
[root@centos8 ~]# vim /data/disk_check.sh
[root@centos8 ~]# cat /data/disk_check.sh
#!/bin/bash
WARNING=80
df|sed -nr '/^\/dev/s#([^ ]) .* ([0-9]+)% .*#\1 \2#p'|while read DEVICE USE;do
    [ $USE -gt $WARNING ] && echo "$DEVICE will be full,USE:$USE" | mail -s "warning" root@waluna.top
done
[root@centos8 ~]# chmod +x /data/disk_check.sh
[root@centos8 ~]# ln -s /data/disk_check.sh /usr/bin/
[root@centos8 ~]# crontab -e
*/10 * * * * disk_check.sh
3 简述linux操作系统启动流程
3.1 centos6
1.打开电源,POST自检,加载BIOS的硬件信息,获取第一个启动设备
2.读取第一个启动设备MBR的引导加载程序(grub)的启动信息,进入GRUB启动的三个阶段
3.加载核心操作系统的核心信息,核心开始解压缩,并尝试驱动所有的硬件设备
4.核心执行init程序,进行初始化,并获取默认的运行信息
5.init程序执行/etc/rc.d/rc.sysinit文件,重新挂载根文件系统
6.启动核心的外挂模块(/etc/modprobe.d/*.conf)
7.init执行运行的各个批处理文件(scripts)
8.init执行/etc/rc.d/rc.local
9.执行/bin/login程序,等待用户登录
10.登录之后开始以Shell控制主机
3.2 centos7
1.UEFi或BIOS初始化,运行POST开机自检
2.选择启动设备
3.引导装载程序, centos7是grub2,加载装载程序的配置文件:
/etc/grub.d/
/etc/default/grub
/boot/grub2/grub.cfg
4.加载initramfs驱动模块
5.加载内核选项
6.内核初始化,centos7使用systemd代替init
7.执行initrd.target所有单元,包括挂载/etc/fstab
8.从initramfs根文件系统切换到磁盘根目录
9.systemd执行默认target配置,配置文件/etc/systemd/system/default.target
10. systemd执行sysinit.target初始化系统及basic.target准备操作系统
11.systemd启动multi-user.target下的本机与服务器服务
12.systemd执行multi-user.target下的/etc/rc.d/rc.local
13. Systemd执行multi-user.target下的getty.target及登录服务
14. systemd执行graphical需要的服务
4 制作一个只运行shell的linux系统
4.1 分区并创建文件系统
# 分两个必要的分区,/dev/sdb1对应/boot   /dev/sdb2对应根/
[root@centos6 ~]# lsblk
NAME                          MAJ:MIN RM  SIZE RO TYPE MOUNTPOINT
sda                             8:0    0   20G  0 disk
├─sda1                          8:1    0  500M  0 part /boot
└─sda2                          8:2    0 19.5G  0 part
  ├─vg_centos6-lv_root (dm-0) 253:0    0 17.6G  0 lvm  /
  └─vg_centos6-lv_swap (dm-1) 253:1    0    2G  0 lvm  [SWAP]
sr0                            11:0    1  3.7G  0 rom
[root@centos6 ~]# echo - - - > /sys/class/scsi_host/host0/scan
[root@centos6 ~]# lsblk
NAME                          MAJ:MIN RM  SIZE RO TYPE MOUNTPOINT
sda                             8:0    0   20G  0 disk
├─sda1                          8:1    0  500M  0 part /boot
└─sda2                          8:2    0 19.5G  0 part
  ├─vg_centos6-lv_root (dm-0) 253:0    0 17.6G  0 lvm  /
  └─vg_centos6-lv_swap (dm-1) 253:1    0    2G  0 lvm  [SWAP]
sr0                            11:0    1  3.7G  0 rom
sdb                             8:16   0   20G  0 disk
[root@centos6 ~]# echo -e 'n\np\n1\n\n+1G\nw\n'|fdisk /dev/sdb
Device contains neither a valid DOS partition table, nor Sun, SGI or OSF disklabel
Building a new DOS disklabel with disk identifier 0xa91e5a50.
Changes will remain in memory only, until you decide to write them.
After that, of course, the previous content won't be recoverable.

Warning: invalid flag 0x0000 of partition table 4 will be corrected by w(rite)

WARNING: DOS-compatible mode is deprecated. It's strongly recommended to
         switch off the mode (command 'c') and change display units to
         sectors (command 'u').

Command (m for help): Command action
   e   extended
   p   primary partition (1-4)
Partition number (1-4): First cylinder (1-2610, default 1): Using default value 1
Last cylinder, +cylinders or +size{K,M,G} (1-2610, default 2610):
Command (m for help): The partition table has been altered!

Calling ioctl() to re-read partition table.
Syncing disks.
[root@centos6 ~]# echo -e 'n\np\n2\n\n\nw\n'|fdisk /dev/sdb

WARNING: DOS-compatible mode is deprecated. It's strongly recommended to
         switch off the mode (command 'c') and change display units to
         sectors (command 'u').

Command (m for help): Command action
   e   extended
   p   primary partition (1-4)
Partition number (1-4): First cylinder (133-2610, default 133): Using default value 133
Last cylinder, +cylinders or +size{K,M,G} (133-2610, default 2610): Using default value 2610

Command (m for help): The partition table has been altered!

Calling ioctl() to re-read partition table.
Syncing disks.
[root@centos6 ~]# mkfs.ext4 /dev/sdb1
mke2fs 1.41.12 (17-May-2010)
Filesystem label=
OS type: Linux
Block size=4096 (log=2)
Fragment size=4096 (log=2)
Stride=0 blocks, Stripe width=0 blocks
66384 inodes, 265064 blocks
13253 blocks (5.00%) reserved for the super user
First data block=0
Maximum filesystem blocks=272629760
9 block groups
32768 blocks per group, 32768 fragments per group
7376 inodes per group
Superblock backups stored on blocks:
        32768, 98304, 163840, 229376

Writing inode tables: done
Creating journal (8192 blocks): done
Writing superblocks and filesystem accounting information: done

This filesystem will be automatically checked every 21 mounts or
180 days, whichever comes first.  Use tune2fs -c or -i to override.
[root@centos6 ~]# mkfs.ext4 /dev/sdb2
mke2fs 1.41.12 (17-May-2010)
Filesystem label=
OS type: Linux
Block size=4096 (log=2)
Fragment size=4096 (log=2)
Stride=0 blocks, Stripe width=0 blocks
1245184 inodes, 4976133 blocks
248806 blocks (5.00%) reserved for the super user
First data block=0
Maximum filesystem blocks=4294967296
152 block groups
32768 blocks per group, 32768 fragments per group
8192 inodes per group
Superblock backups stored on blocks:
        32768, 98304, 163840, 229376, 294912, 819200, 884736, 1605632, 2654208,
        4096000

Writing inode tables: done
Creating journal (32768 blocks): done
Writing superblocks and filesystem accounting information: done

This filesystem will be automatically checked every 21 mounts or
180 days, whichever comes first.  Use tune2fs -c or -i to override.
4.2 挂载boot
# 子目录必须为boot
[root@centos6 ~]# mkdir /mnt/boot
[root@centos6 ~]# mount /dev/sdb1 /mnt/boot
4.3 安装grub
[root@centos6 ~]# grub-install --root-directory=/mnt/ /dev/sdb
Probing devices to guess BIOS drives. This may take a long time.
Installation finished. No error reported.
This is the contents of the device map /mnt//boot/grub/device.map.
Check if this is correct or not. If any of the lines is incorrect,
fix it and re-run the script `grub-install'.

(fd0)   /dev/fd0
(hd0)   /dev/sda
(hd1)   /dev/sdb
4.4 准备内核和initramfs文件
[root@centos6 ~]# cp /boot/vmlinuz-2.6.32-754.el6.x86_64 /mnt/boot/vmlinuz
[root@centos6 ~]# cp /boot/initramfs-2.6.32-754.el6.x86_64.img /mnt/boot/initramfs.img
4.5 建立grub.conf
[root@centos6 ~]# cat /mnt/boot/grub/grub.conf
default=0
timeout=7
title luna linux
root (hd0,0)
kernel /vmlinuz root=/dev/sda2 selinux=0 init=/bin/bash
initrd /initramfs.img
[root@centos6 ~]# tree /mnt/boot/
/mnt/boot/
├── grub
│   ├── device.map
│   ├── e2fs_stage1_5
│   ├── fat_stage1_5
│   ├── ffs_stage1_5
│   ├── grub.conf
│   ├── iso9660_stage1_5
│   ├── jfs_stage1_5
│   ├── minix_stage1_5
│   ├── reiserfs_stage1_5
│   ├── stage1
│   ├── stage2
│   ├── ufs2_stage1_5
│   ├── vstafs_stage1_5
│   └── xfs_stage1_5
├── initramfs.img
├── lost+found
└── vmlinuz

2 directories, 16 files
4.6 准备根下面的相关程序和库
[root@centos6 ~]# mkdir -pv /mnt/sysroot/{boot,dev,sys,proc,etc,bin,sbin,tmp,var,usr,home,root,lib,lib64,opt,mnt,media}
mkdir: created directory `/mnt/sysroot/boot'
mkdir: created directory `/mnt/sysroot/dev'
mkdir: created directory `/mnt/sysroot/sys'
mkdir: created directory `/mnt/sysroot/proc'
mkdir: created directory `/mnt/sysroot/etc'
mkdir: created directory `/mnt/sysroot/bin'
mkdir: created directory `/mnt/sysroot/sbin'
mkdir: created directory `/mnt/sysroot/tmp'
mkdir: created directory `/mnt/sysroot/var'
mkdir: created directory `/mnt/sysroot/usr'
mkdir: created directory `/mnt/sysroot/home'
mkdir: created directory `/mnt/sysroot/root'
mkdir: created directory `/mnt/sysroot/lib'
mkdir: created directory `/mnt/sysroot/lib64'
mkdir: created directory `/mnt/sysroot/opt'
mkdir: created directory `/mnt/sysroot/mnt'
mkdir: created directory `/mnt/sysroot/media'
# busybox:bin,dev,etc,home,proc,root,sys,tmp,usr,var
# 赋值bash等命令和相关库文件,如:
bash,ps,pstree,ifconfig,insmod,ping,mount,ls,cat,df,lsblk,blkid,tree,fdisk,poweroff,reboot,shutdown
[root@centos6 ~]# yum install openssh-clients -y
[root@centos6 ~]# scp 10.0.0.8:~/copycmd.sh .
The authenticity of host '10.0.0.8 (10.0.0.8)' can't be established.
RSA key fingerprint is fe:26:dd:a2:b9:64:97:be:88:4d:58:b5:09:a3:3c:5d.
Are you sure you want to continue connecting (yes/no)? yes
Warning: Permanently added '10.0.0.8' (RSA) to the list of known hosts.
root@10.0.0.8's password:
copycmd.sh                                                            100%  424     0.4KB/s   00:00
[root@centos6 ~]# cat copycmd.sh
#!/bin/bash
while :;do
    read -p "请输入一个可执行命令名称(退出请输出quit):" cmd
    if [ $cmd = quit ];then
        exit
    fi
    dir=`which $cmd|sed -nr "/\/.*/p"`
    mkdir -p /mnt/sysroot`dirname $dir`
    cp $dir /mnt/sysroot/$dir
    for i in `ldd $dir|rev|sed -nr 's#.* (.*\/).*#\1#p'|rev`;do
        mkdir -p /mnt/sysroot`dirname $i`
        cp $i /mnt/sysroot$i
    done
done
[root@centos6 ~]# bash copycmd.sh
请输入一个可执行命令名称(退出请输出quit):bash
请输入一个可执行命令名称(退出请输出quit):ps
请输入一个可执行命令名称(退出请输出quit):pstree
请输入一个可执行命令名称(退出请输出quit):ifconfig
请输入一个可执行命令名称(退出请输出quit):insmod
请输入一个可执行命令名称(退出请输出quit):ping
请输入一个可执行命令名称(退出请输出quit):mount
请输入一个可执行命令名称(退出请输出quit):ls
请输入一个可执行命令名称(退出请输出quit):cat
请输入一个可执行命令名称(退出请输出quit):df
请输入一个可执行命令名称(退出请输出quit):lsblk
请输入一个可执行命令名称(退出请输出quit):blkid
请输入一个可执行命令名称(退出请输出quit):tree
请输入一个可执行命令名称(退出请输出quit):fdisk
请输入一个可执行命令名称(退出请输出quit):poweroff
请输入一个可执行命令名称(退出请输出quit):reboot
请输入一个可执行命令名称(退出请输出quit):shutdown
请输入一个可执行命令名称(退出请输出quit):quit
[root@centos6 ~]# tree /mnt/sysroot/
/mnt/sysroot/
├── bin
│   ├── bash
│   ├── cat
│   ├── df
│   ├── ls
│   ├── lsblk
│   ├── mount
│   ├── ping
│   └── ps
├── boot
├── dev
├── etc
│   └── mtab
├── home
├── lib
│   └── e1000.ko
├── lib64
│   ├── ld-linux-x86-64.so.2
│   ├── libacl.so.1
│   ├── libattr.so.1
│   ├── libaudit.so.1
│   ├── libblkid.so.1
│   ├── libcap.so.2
│   ├── libc.so.6
│   ├── libdbus-1.so.3
│   ├── libdl.so.2
│   ├── libgcc_s.so.1
│   ├── libidn.so.11
│   ├── libnih-dbus.so.1
│   ├── libnih.so.1
│   ├── libproc-3.2.8.so
│   ├── libpthread.so.0
│   ├── librt.so.1
│   ├── libselinux.so.1
│   ├── libsepol.so.1
│   ├── libtinfo.so.5
│   └── libuuid.so.1
├── lost+found
├── media
├── mnt
├── opt
├── proc
├── root
├── sbin
│   ├── blkid
│   ├── fdisk
│   ├── ifconfig
│   ├── insmod
│   ├── poweroff
│   ├── reboot
│   └── shutdown
├── sys
├── tmp
├── usr
│   └── bin
│       ├── pstree
│       └── tree
└── var

19 directories, 39 files
# 准备网卡驱动
[root@centos6 ~]# ethtool -i eth0
driver: e1000
version: 7.3.21-k8-NAPI
firmware-version:
bus-info: 0000:02:01.0
supports-statistics: yes
supports-test: yes
supports-eeprom-access: yes
supports-register-dump: yes
supports-priv-flags: no
[root@centos6 ~]# modinfo -n e1000
/lib/modules/2.6.32-754.el6.x86_64/kernel/drivers/net/e1000/e1000.ko
[root@centos6 ~]# cp /lib/modules/2.6.32-754.el6.x86_64/kernel/drivers/net/e1000/e1000.ko /mnt/sysroot/lib
[root@centos6 ~]# chroot /mnt/sysroot/
bash-4.1# ls
bin   dev  home  lib64       media  opt   root  sys  usr
boot  etc  lib   lost+found  mnt    proc  sbin  tmp  var
bash-4.1# pwd
/
4.7 准备新的虚拟机
将前一虚拟机sdb硬盘对应的vmdk文件增加进去,删除原有磁盘,开机启动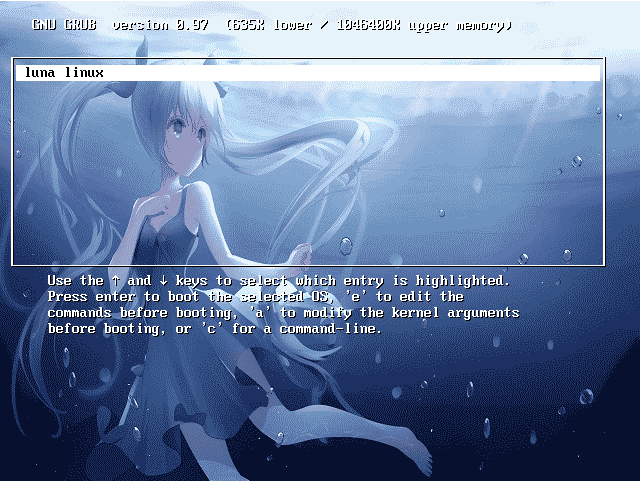
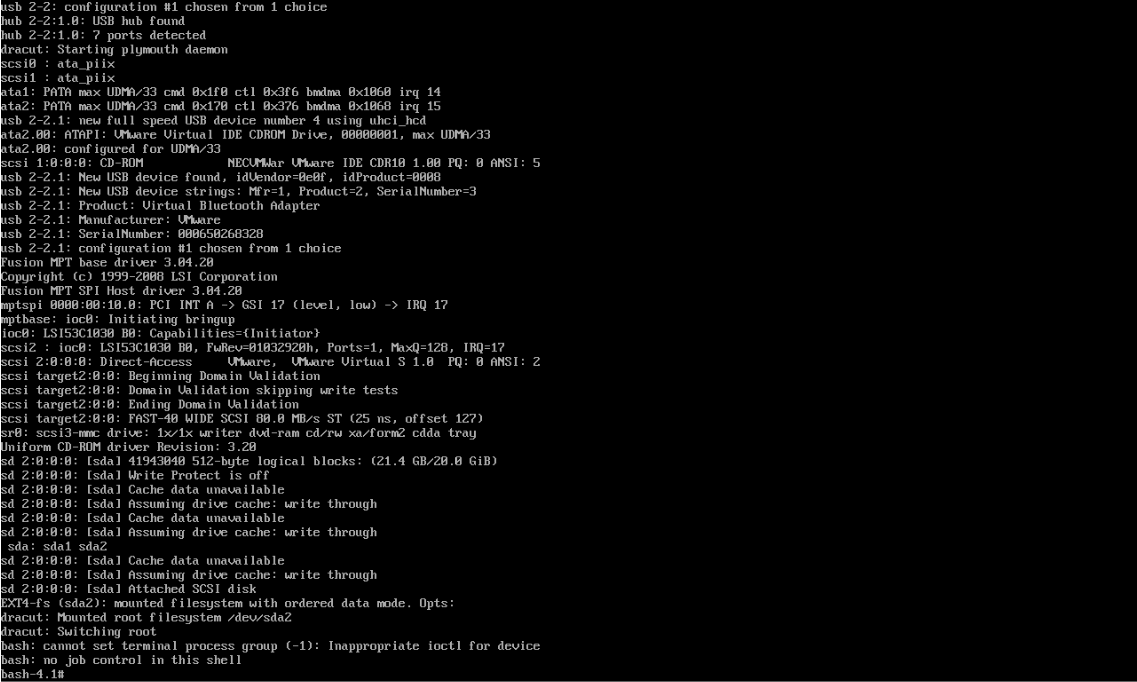
成功开机
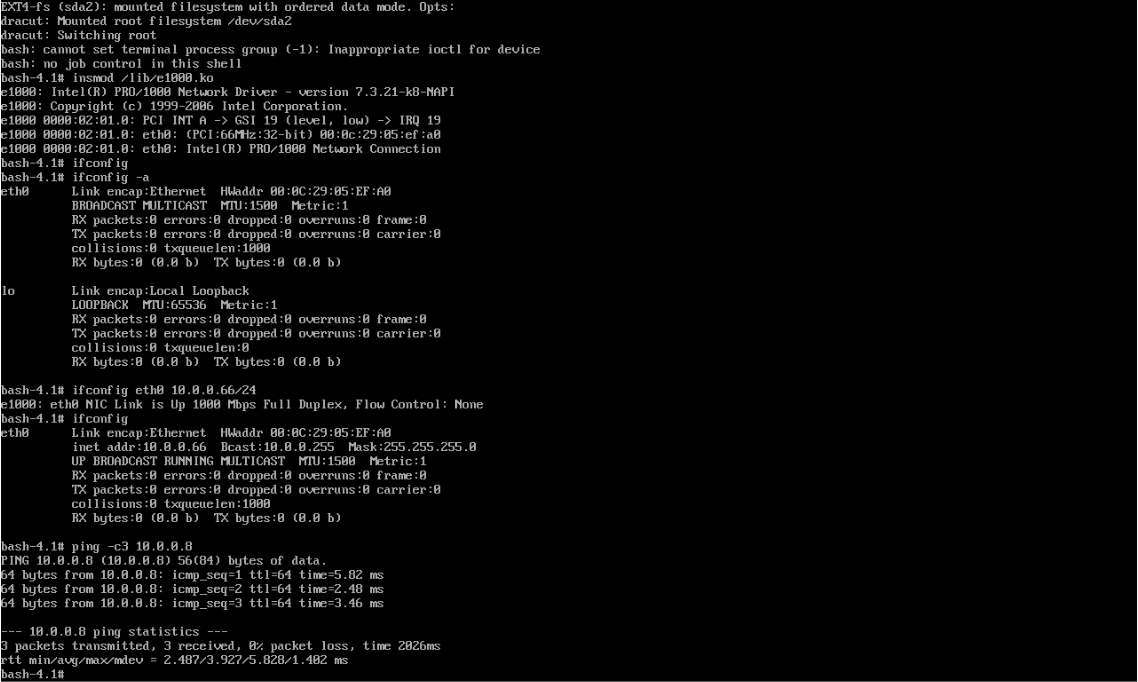
配置网卡
5 总结systemctl管理命令及system unit文件格式
5.1 systemctl用法
# 启动:相当于service name start
systemctl start name.service
# 停止:相当于service name stop
systemctl stop name.service
# 重启:相当于service name restart
systemctl restart name.service
# 查看状态:相当于service name status
systemctl status name.service
# 禁止自动和手动启动:
systemctl mask name.service
# 取消禁止
systemctl unmask name.service
# 查看某服务当前激活与否的状态:
systemctl is-active name.service
# 查看所有已经激活的服务
systemctl list-units --type|-t service
# 查看所有服务:
systemctl list-units --type service --all|-a
# 设定某服务开机自启:相当于chkconfig name on
systemctl enable name.service
# 设定某服务开机禁止启动:相当于chkconfig name off
systemctl disable name.service
# 查看所有服务的开机自启状态,相当于chkconfig --list
systemctl list-unit-files --type service
# 用来列出该服务在那些运行级别下启动和禁用:chkconfig --list name
ls /etc/systemd/system/*.wants/name.service
# 查看服务是否开机自启:
systemctl is-enabled name.service
# 列出失败的服务
systemctl --failed --type=service
# 开机自启并立即启动
systemctl enable --now name.service
# 立即关闭并禁用开机自启
systemctl disable --now name.service
# 查看服务的依赖关系:
systemctl list-dependencies name.service
# 杀掉进程:
systemctl kill unitname
服务状态
# 显示状态
systemctl list-unit-files --type service -all- loaded Unit配置文件已处理
- active(running) 一次或多次持续处理的运行
- active(exited) 成功完成一次性的配置
- active(waiting) 运行中,等待一个事件
- inactive 不运行
- enabled 开机启动
- disabled 开机不启动
- static 开机不启动,但可被另一个启用的服务激活
- indirect 重定向到别处
# 显示所有单元状态
systemctl 或 systemctl list-units
# 只显示服务单元的状态
systemctl --type=service
# 显示sshd服务单元
systemctl -l status sshd.service
# 验证sshd服务当前是否活动
systemctl is-active sshd
# 列出活动状态的所有服务单元
systemctl list-units --type service
# 列出所有服务单元
systemctl list-units --type service -all
# 查看服务的单元的启用和禁用状态
systemctl list-unit-files --type service
# 列出依赖的单元
systemctl list-dependencies sshd
5.2 system unit文件格式
unit格式说明:
- 以“#”开头的行后面的内容会被认为是注释
- 相关布尔值,1、yes、on、true都是开启,0、no、off、false都是关闭
- 时间单位默认是秒,所以要用毫秒(ms)分钟(m)等须显式说明
service unit file文件通常由三部分组成:
[Unit]:定义与Unit类型无关的通用选项;用于提供unit的描述信息、unit行为及依赖关系等
[Service]:与特定类型相关的专用选项;此处为Service类型
[Install]:定义由"systemctl enable"以及"systemctl disable"命令在实现服务启用或禁用时用到的一些选项
Unit段的常用选项:
Description:描述信息
After:定义unit的启动次序,表示当前unit应该晚于哪些unit启动,其功能与Before相反
Requires:依赖到的其它units,强依赖,被依赖的units无法激活时,当前unit也无法激活
Wants:依赖到的其它units,弱依赖
Conflicts:定义units间的冲突关系
service段的常用选项:
Type:定义影响ExecStart及相关参数的功能的unit进程启动类型
    simple:默认值,这个daemon主要由ExecStart接的指令串来启动,启动后常驻于内存中
    forking:由ExecStart启动的程序透过spawns延伸出其他子程序来作为此daemon的主要服务。原生父程序在启动结束后就会终止
    oneshot:与simple类似,不过这个程序在工作完毕后就结束了,不会常驻在内存中
    dbus:与simple类似,但这个daemon必须要在取得一个D-Bus的名称后,才会继续运作.因此通常也要同时设定BusNname=才行
    notify:在启动完成后会发送一个通知消息。还需要配合NotifyAccess来让 Systemd接收消息
    idle:与simple类似,要执行这个daemon必须要所有的工作都顺利执行完毕后才会执行。这类的daemon通常是开机到最后才执行即可的服务

EnvironmentFile:环境配置文件
ExecStart:指明启动unit要运行命令或脚本的绝对路径
ExecStartPre:Execstart前运行
ExecStartPost:ExecStart后运行
ExecStop:指明停止unit要运行的命令或脚本
Restart:当设定Restart=1时,则当次daemon服务意外终止后,会再次自动启动此服务
PrivateTmp:设定为yes时,会在生成/tmp/systemd-private-UUID-NAME.service-XXXXX/tmp/目录
Install段的常用选项:
Alias:别名,可使用systemctl command Alias.service
RequiredBy:被哪些units所依赖,强依赖
WantedBy:被哪些units所依赖,弱依赖
Also:安装本服务的时候还要安装别的相关服务
注意:对于新创建的unit文件,或者修改了的unit文件,要通知systemd重载此配置文件,而后可以选择重启
例:
[Unit]
Description=The Nginx HTTP Server daemon   # 描述信息
After=network.target remote-fs.target nss-lookup.target   # 指定启动nginx之前需要其他的其他服务,如network.target等
[Service]
# Type为服务类型,仅启动一个主进程的服务为simple,需要启动若干个子进程的服务为forking
Type=forking
# 设置执行systemctl start nginx后需要启动的具体命令
ExecStart=/usr/local/nginx/sbin/nginx
# 设置执行systemctl reload nginx后需要执行的具体命令
ExecReload=/usr/local/nginx/sbin/nginx -s reload
# 设置执行systemctl stop nginx后需要执行的具体命令
ExecStop=/bin/kill -s QUIT ${MAINPID}
[Install]
# 设置在什么模式下被安装,设置开机启动的时候需要
WantedBy=multi-user.target
6 破解centos7 密码
6.1 方法 1
启动时任意键暂停启动
按e键进入编辑模式
将光标移动linux开始的行,添加内核参数rd.break   # rd.break为打断正常启动
按ctr1-x启动
mount -o remount,rw /sysroot
chroot /sysroot
passwd root
# 如果SELinux是启用的,才需要执行下面操作,如查没有启动,不需要执行
touch /.autorelabel
exit
reboot
6.2 方法 2
启动时任意键暂停启动
按e键进入编辑模式
将光标移动linux开始的行,改为rw init=/sysroot/bin/sh
按ctrl-x启动
chroot /sysroot
passwd root
# 如果SELinux是启用的,才需要执行下面操作,如查没有启动,不需要执行
touch /.autorelabel
exit
reboot
Comments | 2 条评论
系统安装界面都整那么好看,真是厉害了!
你第一题的计划任务里有%,不加转义能正常运行吗?