









KVM实现内外网络隔离综合案例
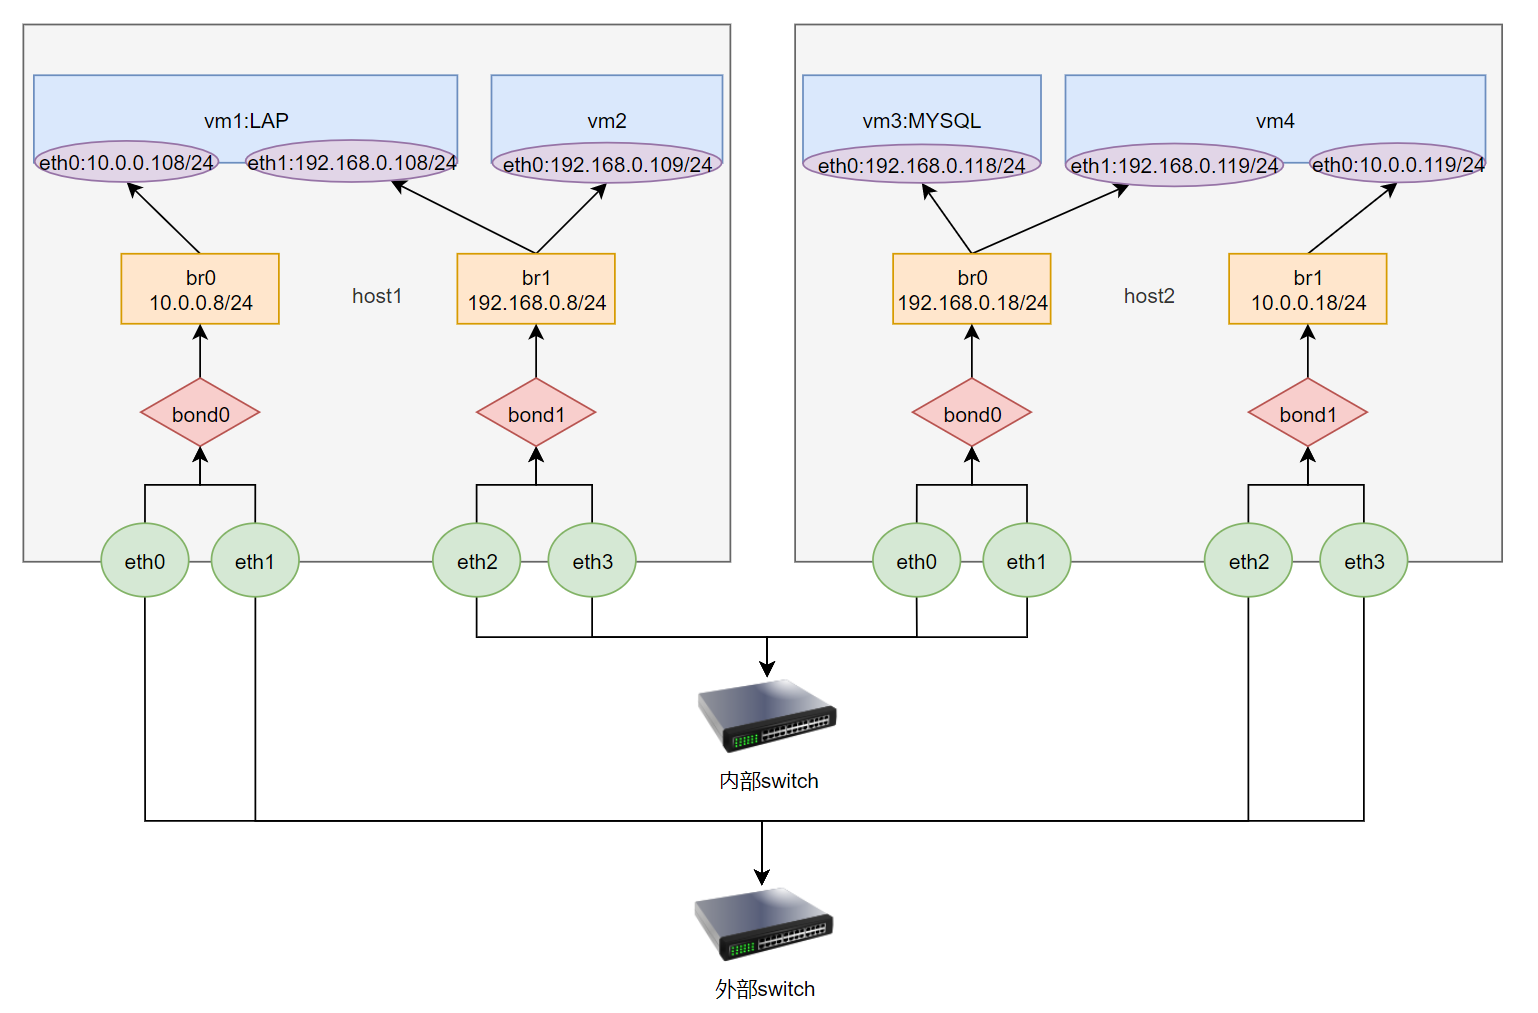
实现一个外网的web服务和内网的数据库相互隔离的环境
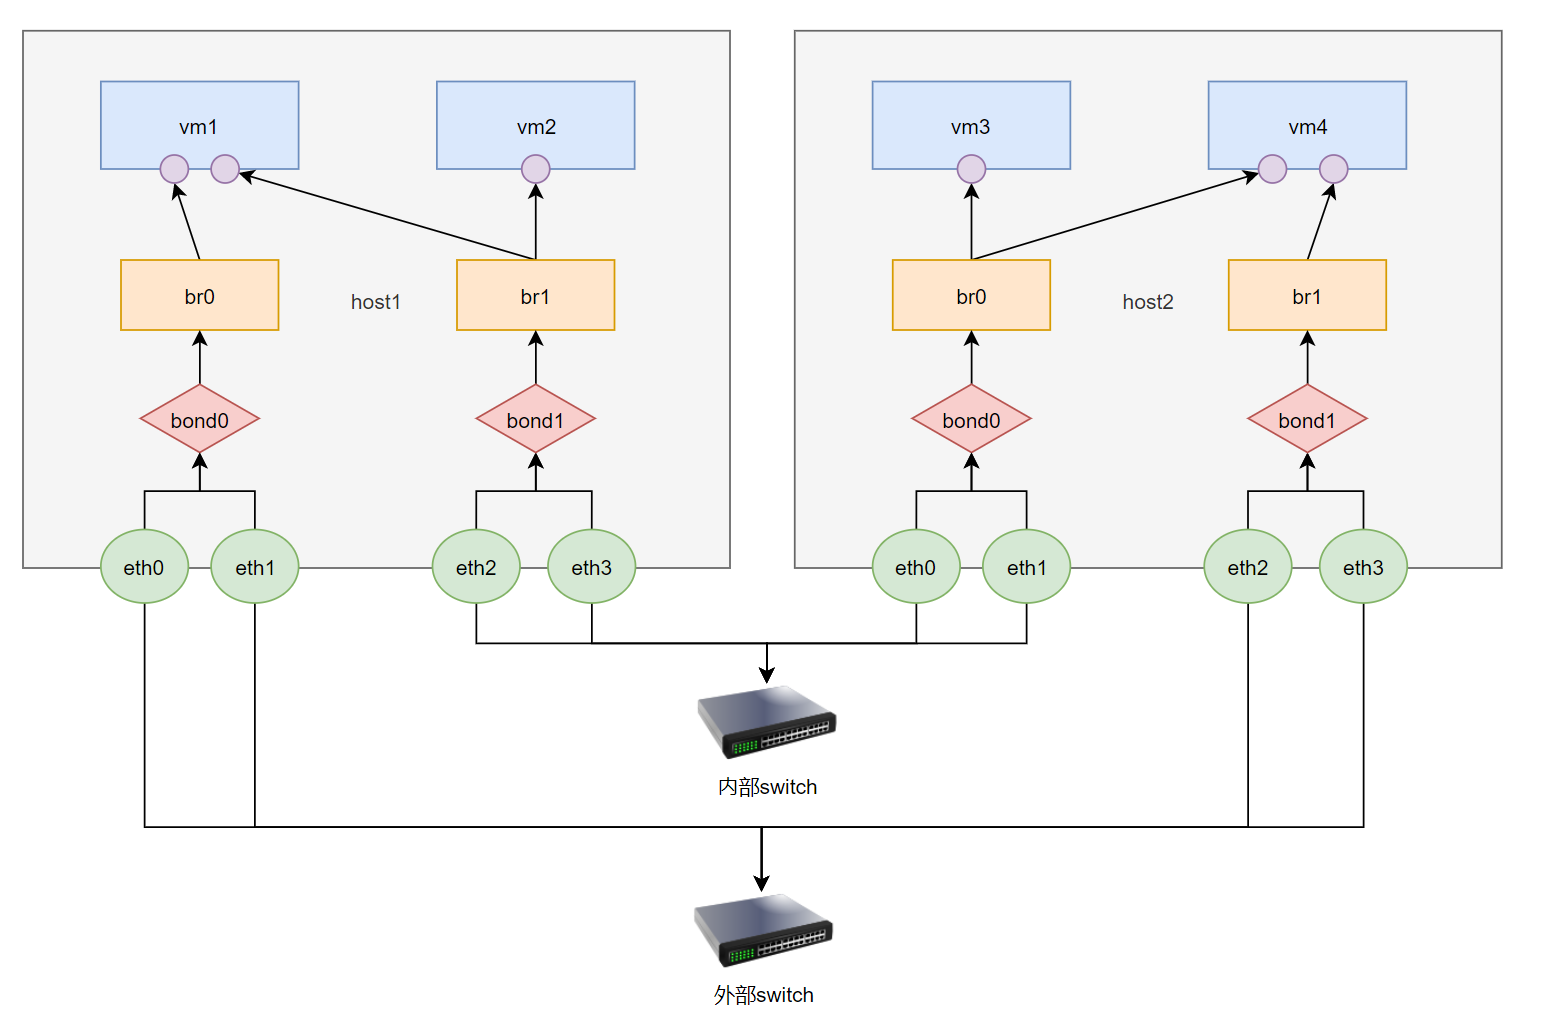
两台宿主机host1和host2
每个宿主机上面各有两个虚拟机,分别连接外网和内网交换机
1 环境准备
关闭firewalld,禁用selinux!!!

两台宿主机:
host1:
br0:10.0.0.8/24
br1:192.168.0.18/24
host2:
br0:10.0.0.18/24
br1:192.168.0.18/24
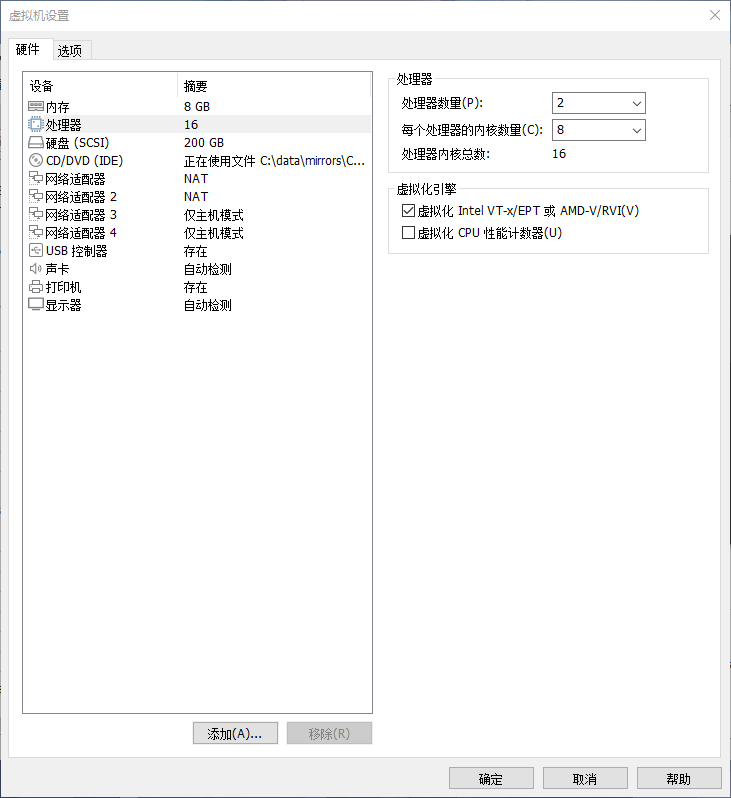
每台宿主机四个网卡
每台宿主机包含两台虚拟机
内部switch用vmnet1
外部siwtch用vmnet8
vm1:   # LAP服务
eth0:10.0.0.108/24
eth1:192.168.0.108/24
vm2:
eth0:192.168.0.109/24
vm3:   # MYSQL服务
eth0:192.168.0.118/24
vm4:
eth0:10.0.0.118/24
eth1:192.168.0.119/24
两台宿主机同样配置
2 实现网卡绑定和桥接
2.1 修改配置文件实现host1
# 写配置文件
[root@host1 ~]# cd /etc/sysconfig/network-scripts/
[root@host1 network-scripts]# cat ifcfg-br0
TYPE=Bridge
NAME=br0
DEVICE=br0
STP=yes
BOOTPROTO=none
IPADDR=10.0.0.8
PREFIX=24
GATEWAY=10.0.0.2
DNS1=114.114.114.114
DNS2=223.5.5.5
ONBOOT=yes
[root@host1 network-scripts]# vim ifcfg-bond0
[root@host1 network-scripts]# cat ifcfg-bond0
TYPE=Bond
NAME=bond0
DEVICE=bond0
BOOTPROTO=none
BONDING_OPTS=mode=active-backup
BRIDGE=br0
ONBOOT=yes
[root@host1 network-scripts]# vim ifcfg-eth0
[root@host1 network-scripts]# cat ifcfg-eth0
TYPE=Ethernet
NAME=eth0
DEVICE=eth0
BOOTPROTO=static
ONBOOT=yes
MASTER=bond0
SLAVE=yes
[root@host1 network-scripts]# vim ifcfg-eth1
[root@host1 network-scripts]# cat ifcfg-eth1
TYPE=Ethernet
NAME=eth1
DEVICE=eth1
BOOTPROTO=static
ONBOOT=yes
MASTER=bond0
SLAVE=yes

[root@host1 network-scripts]# vim ifcfg-br1
[root@host1 network-scripts]# cat ifcfg-br1
TYPE=Bridge
NAME=br1
DEVICE=br1
STP=yes
BOOTPROTO=none
IPADDR=192.168.0.8
PREFIX=24
GATEWAY=192.168.0.2
ONBOOT=yes
[root@host1 network-scripts]# vim ifcfg-bond1
[root@host1 network-scripts]# cat ifcfg-bond1
TYPE=Bond
NAME=bond1
DEVICE=bond1
BOOTPROTO=none
BONDING_OPTS=mode=active-backup
BRIDGE=br1
ONBOOT=yes
[root@host1 network-scripts]# vim ifcfg-eth2
[root@host1 network-scripts]# cat ifcfg-eth2
TYPE=Ethernet
NAME=eth2
DEVICE=eth2
BOOTPROTO=static
ONBOOT=yes
MASTER=bond1
SLAVE=yes
[root@host1 network-scripts]# vim ifcfg-eth3
[root@host1 network-scripts]# cat ifcfg-eth3
TYPE=Ethernet
NAME=eth3
DEVICE=eth3
BOOTPROTO=static
ONBOOT=yes
MASTER=bond1
SLAVE=yes

# 使配置文件生效
[root@host1 network-scripts]# nmcli connection reload
[root@host1 network-scripts]# nmcli connection up br0
Connection successfully activated (master waiting for slaves) (D-Bus active path: /org/freedesktop/NetworkManager/ActiveConnection/8)
[root@host1 network-scripts]# nmcli connection up bond0
Connection successfully activated (master waiting for slaves) (D-Bus active path: /org/freedesktop/NetworkManager/ActiveConnection/10)
[root@host1 network-scripts]# nmcli connection up eth0
Connection successfully activated (D-Bus active path: /org/freedesktop/NetworkManager/ActiveConnection/11)
[root@host1 network-scripts]# nmcli connection up eth1
Connection successfully activated (D-Bus active path: /org/freedesktop/NetworkManager/ActiveConnection/12)
[root@host1 network-scripts]# nmcli connection up br1
Connection successfully activated (master waiting for slaves) (D-Bus active path: /org/freedesktop/NetworkManager/ActiveConnection/15)
[root@host1 network-scripts]# nmcli connection up bond1
Connection successfully activated (master waiting for slaves) (D-Bus active path: /org/freedesktop/NetworkManager/ActiveConnection/17)
[root@host1 network-scripts]# nmcli connection up eth2
Connection successfully activated (D-Bus active path: /org/freedesktop/NetworkManager/ActiveConnection/18)
[root@host1 network-scripts]# nmcli connection up eth3
Connection successfully activated (D-Bus active path: /org/freedesktop/NetworkManager/ActiveConnection/19)

# 查看状态
[root@host1 network-scripts]# nmcli connection
NAME                UUID                                  TYPE      DEVICE
br0                 d2d68553-f97e-7549-7a26-b34a26f29318  bridge    br0
br1                 2ee981ca-5ff4-4f9b-03fe-32879aa3dc85  bridge    br1
bond0               ad33d8b0-1f7b-cab9-9447-ba07f855b143  bond      bond0
bond1               92306dc1-4142-23de-097b-b1464cfab5ee  bond      bond1
eth0                5fb06bd0-0bb0-7ffb-45f1-d6edd65f3e03  ethernet  eth0
eth1                9c92fad9-6ecb-3e6c-eb4d-8a47c6f50c04  ethernet  eth1
eth2                3a73717e-65ab-93e8-b518-24f5af32dc0d  ethernet  eth2
eth3                c5ca8081-6db2-4602-4b46-d771f4330a6d  ethernet  eth3
Wired connection 1  abc9f190-1136-3812-83a2-e744659ee09b  ethernet  --
Wired connection 2  0b2d2906-100a-3a5f-8043-551279117b6b  ethernet  --
Wired connection 3  d4ee2564-f5fc-3b0d-8765-c69a28c694b5  ethernet  --
[root@host1 network-scripts]# ip a
1: lo: <LOOPBACK,UP,LOWER_UP> mtu 65536 qdisc noqueue state UNKNOWN group default qlen 1000
    link/loopback 00:00:00:00:00:00 brd 00:00:00:00:00:00
    inet 127.0.0.1/8 scope host lo
       valid_lft forever preferred_lft forever
    inet6 ::1/128 scope host
       valid_lft forever preferred_lft forever
2: eth0: <BROADCAST,MULTICAST,SLAVE,UP,LOWER_UP> mtu 1500 qdisc fq_codel master bond0 state UP group default qlen 1000
    link/ether 00:0c:29:19:bf:73 brd ff:ff:ff:ff:ff:ff
3: eth1: <BROADCAST,MULTICAST,SLAVE,UP,LOWER_UP> mtu 1500 qdisc fq_codel master bond0 state UP group default qlen 1000
    link/ether 00:0c:29:19:bf:73 brd ff:ff:ff:ff:ff:ff
4: eth2: <BROADCAST,MULTICAST,SLAVE,UP,LOWER_UP> mtu 1500 qdisc fq_codel master bond1 state UP group default qlen 1000
    link/ether 00:0c:29:19:bf:87 brd ff:ff:ff:ff:ff:ff
5: eth3: <BROADCAST,MULTICAST,SLAVE,UP,LOWER_UP> mtu 1500 qdisc fq_codel master bond1 state UP group default qlen 1000
    link/ether 00:0c:29:19:bf:87 brd ff:ff:ff:ff:ff:ff
6: br0: <BROADCAST,MULTICAST,UP,LOWER_UP> mtu 1500 qdisc noqueue state UP group default qlen 1000
    link/ether 00:0c:29:19:bf:73 brd ff:ff:ff:ff:ff:ff
    inet 10.0.0.8/24 brd 10.0.0.255 scope global noprefixroute br0
       valid_lft forever preferred_lft forever
    inet6 fe80::20c:29ff:fe19:bf73/64 scope link
       valid_lft forever preferred_lft forever
8: bond0: <BROADCAST,MULTICAST,MASTER,UP,LOWER_UP> mtu 1500 qdisc noqueue master br0 state UP group default qlen 1000
    link/ether 00:0c:29:19:bf:73 brd ff:ff:ff:ff:ff:ff
9: br1: <BROADCAST,MULTICAST,UP,LOWER_UP> mtu 1500 qdisc noqueue state UP group default qlen 1000
    link/ether 00:0c:29:19:bf:87 brd ff:ff:ff:ff:ff:ff
    inet 192.168.0.8/24 brd 192.168.0.255 scope global noprefixroute br1
       valid_lft forever preferred_lft forever
    inet6 fe80::20c:29ff:fe19:bf87/64 scope link
       valid_lft forever preferred_lft forever
11: bond1: <BROADCAST,MULTICAST,MASTER,UP,LOWER_UP> mtu 1500 qdisc noqueue master br1 state UP group default qlen 1000
    link/ether 00:0c:29:19:bf:87 brd ff:ff:ff:ff:ff:ff
2.2 用命令实现host2
# 实现第一组
[root@host2 ~]# nmcli connection add type bridge con-name br0 ifname br0 ipv4.addresses 192.168.0.18/24 ipv4.gateway 192.168.0.2 ipv4.method manual
Connection 'br0' (5849d5ae-c36c-4c27-936f-2aada2864561) successfully added.
[root@host2 ~]# nmcli connection add type bond con-name bond0 ifname bond0 mode active-backup master br0
Connection 'bond0' (6cc7b9bf-418a-4a4d-a513-ac9fdc9e8c8e) successfully added.
[root@host2 ~]# nmcli connection add type bond-slave con-name eth0 ifname eth0 master bond0
Connection 'eth0' (e206dc8a-8795-4ee5-99d5-f123f57f1581) successfully added.
[root@host2 ~]# nmcli connection add type bond-slave con-name eth1 ifname eth1 master bond0
Connection 'eth1' (0d794f5a-490f-4784-a19e-c513f279bfaf) successfully added.

# 实现第二组
[root@host2 ~]# nmcli connection add type bridge con-name br1 ifname br1 ipv4.addresses 10.0.0.18/24 ipv4.gateway 10.0.0.2 ipv4.dns 114.114.114.114 ipv4.dns 223.5.5.5 ipv4.method manual
Connection 'br1' (0bda2b5c-72ab-466b-aa8c-1f66547aba8b) successfully added.
[root@host2 ~]# nmcli connection add type bond con-name bond1 ifname bond1 mode active-backup master br1
Connection 'bond1' (bf4595e2-ab78-413f-b3de-6e72af16c2bf) successfully added.
[root@host2 network-scripts]# nmcli connection add type bond-slave con-name eth2 ifname eth2 master bond1
Connection 'eth2' (909f5cf1-5740-4b05-9b0f-8c72c216bc0b) successfully added.
[root@host2 ~]# nmcli connection add type bond-slave con-name eth3 ifname eth3 master bond1
Connection 'eth3' (4d174a57-f81d-45e5-a50f-c941adf1b107) successfully added.

# 使其生效
[root@host2 ~]# nmcli connection reload
[root@host2 ~]# nmcli connection up br0
Connection successfully activated (master waiting for slaves) (D-Bus active path: /org/freedesktop/NetworkManager/ActiveConnection/21)
[root@host2 ~]# nmcli connection up br1
Connection successfully activated (master waiting for slaves) (D-Bus active path: /org/freedesktop/NetworkManager/ActiveConnection/25)
[root@host2 ~]# nmcli connection up bond0
Connection successfully activated (master waiting for slaves) (D-Bus active path: /org/freedesktop/NetworkManager/ActiveConnection/29)
[root@host2 ~]# nmcli connection up bond1
Connection successfully activated (master waiting for slaves) (D-Bus active path: /org/freedesktop/NetworkManager/ActiveConnection/32)
[root@host2 ~]# nmcli connection up eth0
Connection successfully activated (D-Bus active path: /org/freedesktop/NetworkManager/ActiveConnection/35)
[root@host2 ~]# nmcli connection up eth1
Connection successfully activated (D-Bus active path: /org/freedesktop/NetworkManager/ActiveConnection/36)
[root@host2 ~]# nmcli connection up eth2
Connection successfully activated (D-Bus active path: /org/freedesktop/NetworkManager/ActiveConnection/37)
[root@host2 ~]# nmcli connection up eth3
Connection successfully activated (D-Bus active path: /org/freedesktop/NetworkManager/ActiveConnection/38)

# 查看状态
[root@host2 ~]# nmcli connection
NAME   UUID                                  TYPE      DEVICE
br0    5849d5ae-c36c-4c27-936f-2aada2864561  bridge    br0
br1    0bda2b5c-72ab-466b-aa8c-1f66547aba8b  bridge    br1
bond0  6cc7b9bf-418a-4a4d-a513-ac9fdc9e8c8e  bond      bond0
bond1  bf4595e2-ab78-413f-b3de-6e72af16c2bf  bond      bond1
eth0   e206dc8a-8795-4ee5-99d5-f123f57f1581  ethernet  eth0
eth1   0d794f5a-490f-4784-a19e-c513f279bfaf  ethernet  eth1
eth2   909f5cf1-5740-4b05-9b0f-8c72c216bc0b  ethernet  eth2
eth3   4d174a57-f81d-45e5-a50f-c941adf1b107  ethernet  eth3
[root@host2 ~]# ip a
1: lo: <LOOPBACK,UP,LOWER_UP> mtu 65536 qdisc noqueue state UNKNOWN group default qlen 1000
    link/loopback 00:00:00:00:00:00 brd 00:00:00:00:00:00
    inet 127.0.0.1/8 scope host lo
       valid_lft forever preferred_lft forever
    inet6 ::1/128 scope host
       valid_lft forever preferred_lft forever
2: eth0: <BROADCAST,MULTICAST,SLAVE,UP,LOWER_UP> mtu 1500 qdisc fq_codel master bond0 state UP group default qlen 1000
    link/ether 00:0c:29:91:72:d3 brd ff:ff:ff:ff:ff:ff
3: eth1: <BROADCAST,MULTICAST,SLAVE,UP,LOWER_UP> mtu 1500 qdisc fq_codel master bond0 state UP group default qlen 1000
    link/ether 00:0c:29:91:72:d3 brd ff:ff:ff:ff:ff:ff
4: eth2: <BROADCAST,MULTICAST,SLAVE,UP,LOWER_UP> mtu 1500 qdisc fq_codel master bond1 state UP group default qlen 1000
    link/ether 00:0c:29:91:72:e7 brd ff:ff:ff:ff:ff:ff
5: eth3: <BROADCAST,MULTICAST,SLAVE,UP,LOWER_UP> mtu 1500 qdisc fq_codel master bond1 state UP group default qlen 1000
    link/ether 00:0c:29:91:72:e7 brd ff:ff:ff:ff:ff:ff
10: br0: <BROADCAST,MULTICAST,UP,LOWER_UP> mtu 1500 qdisc noqueue state UP group default qlen 1000
    link/ether 00:0c:29:91:72:d3 brd ff:ff:ff:ff:ff:ff
    inet 192.168.0.18/24 brd 192.168.0.255 scope global noprefixroute br0
       valid_lft forever preferred_lft forever
    inet6 fe80::ea6c:73f0:a898:ec75/64 scope link noprefixroute
       valid_lft forever preferred_lft forever
12: br1: <BROADCAST,MULTICAST,UP,LOWER_UP> mtu 1500 qdisc noqueue state UP group default qlen 1000
    link/ether 00:0c:29:91:72:e7 brd ff:ff:ff:ff:ff:ff
    inet 10.0.0.18/24 brd 10.0.0.255 scope global noprefixroute br1
       valid_lft forever preferred_lft forever
    inet6 fe80::8711:344a:8517:ef25/64 scope link noprefixroute
       valid_lft forever preferred_lft forever
14: bond0: <BROADCAST,MULTICAST,MASTER,UP,LOWER_UP> mtu 1500 qdisc noqueue master br0 state UP group default qlen 1000
    link/ether 00:0c:29:91:72:d3 brd ff:ff:ff:ff:ff:ff
15: bond1: <BROADCAST,MULTICAST,MASTER,UP,LOWER_UP> mtu 1500 qdisc noqueue master br1 state UP group default qlen 1000
    link/ether 00:0c:29:91:72:e7 brd ff:ff:ff:ff:ff:ff
2.3 测试
# host1
[root@host1 ~]# ping -c1 10.0.0.18
PING 10.0.0.18 (10.0.0.18) 56(84) bytes of data.
64 bytes from 10.0.0.18: icmp_seq=1 ttl=64 time=0.364 ms

--- 10.0.0.18 ping statistics ---
1 packets transmitted, 1 received, 0% packet loss, time 0ms
rtt min/avg/max/mdev = 0.364/0.364/0.364/0.000 ms
[root@host1 ~]# ping -c1 192.168.0.18
PING 192.168.0.18 (192.168.0.18) 56(84) bytes of data.
64 bytes from 192.168.0.18: icmp_seq=1 ttl=64 time=0.560 ms

--- 192.168.0.18 ping statistics ---
1 packets transmitted, 1 received, 0% packet loss, time 0ms
rtt min/avg/max/mdev = 0.560/0.560/0.560/0.000 ms
[root@host1 ~]# ping -c1 baidu.com
PING baidu.com (39.156.69.79) 56(84) bytes of data.
64 bytes from 39.156.69.79 (39.156.69.79): icmp_seq=1 ttl=128 time=32.2 ms

--- baidu.com ping statistics ---
1 packets transmitted, 1 received, 0% packet loss, time 0ms
rtt min/avg/max/mdev = 32.239/32.239/32.239/0.000 ms

# host2
[root@host2 ~]# ping -c1 10.0.0.8
PING 10.0.0.8 (10.0.0.8) 56(84) bytes of data.
64 bytes from 10.0.0.8: icmp_seq=1 ttl=64 time=0.243 ms

--- 10.0.0.8 ping statistics ---
1 packets transmitted, 1 received, 0% packet loss, time 0ms
rtt min/avg/max/mdev = 0.243/0.243/0.243/0.000 ms
[root@host2 ~]# ping -c1 192.168.0.8
PING 192.168.0.8 (192.168.0.8) 56(84) bytes of data.
64 bytes from 192.168.0.8: icmp_seq=1 ttl=64 time=0.266 ms

--- 192.168.0.8 ping statistics ---
1 packets transmitted, 1 received, 0% packet loss, time 0ms
rtt min/avg/max/mdev = 0.266/0.266/0.266/0.000 ms
[root@host2 ~]# ping -c1 baidu.com
PING baidu.com (220.181.38.148) 56(84) bytes of data.
64 bytes from 220.181.38.148 (220.181.38.148): icmp_seq=1 ttl=128 time=33.6 ms

--- baidu.com ping statistics ---
1 packets transmitted, 1 received, 0% packet loss, time 0ms
rtt min/avg/max/mdev = 33.574/33.574/33.574/0.000 ms
3 创建虚拟机
3.1 在host1上用命令安装虚拟机
# 安装相关包并启动服务
[root@host1 ~]# dnf install qemu-kvm libvirt virt-manager virt-install virt-viewer -y
[root@host1 ~]# systemctl enable --now libvirtd
[root@host1 ~]# export DISPLAY=10.0.0.1:0
[root@host1 ~]# virt-manager

# 准备镜像文件
[root@host1 ~]# mkdir /data/isos
[root@host1 ~]# ll -h /data/isos/
total 1.8G
-rw-r--r-- 1 root root 1.8G Jun 29 15:57 CentOS-8.3.2011-x86_64-minimal.iso

# 创建虚拟磁盘文件
[root@host1 ~]# qemu-img create -f qcow2 /var/lib/libvirt/images/centos8-1.qcow2 10G
Formatting '/var/lib/libvirt/images/centos8-1.qcow2', fmt=qcow2 size=10737418240 cluster_size=65536 lazy_refcounts=off refcount_bits=16

# 安装虚拟机vm1
[root@host1 ~]# virt-install --virt-type kvm --name centos8-1 --ram 2048 --vcpus 4 --os-type=liunx --os-variant=centos8 --cdrom=/data/isos/CentOS-8.3.2011-x86_64-minimal.iso --disk path=/var/lib/libvirt/images/centos8-1.qcow2,format=qcow2,bus=virtio --network=bridge:br0,model=virtio --graphics vnc,listen=0.0.0.0 --noautoconsole --autostart --boot hd

Starting install...
Domain installation still in progress. You can reconnect to
the console to complete the installation process.

# 基于vm1安装vm2
[root@host1 ~]# cp /var/lib/libvirt/images/centos8-1.qcow2 /var/lib/libvirt/images/centos8-2.qcow2

[root@host1 ~]# virt-install --virt-type kvm --name centos8-2 --ram 2048 --vcpus 4 --os-type=liunx --os-variant=centos8 --disk path=/var/lib/libvirt/images/centos8-2.qcow2,format=qcow2,bus=virtio --network=bridge:br1,model=virtio --graphics vnc,listen=0.0.0.0 --noautoconsole --autostart --boot hd --import

Starting install...
Domain creation completed.

# 查看虚拟机列表
[root@host1 ~]# virsh list --all
 Id   Name        State
----------------------------
 -    centos8-1   shut off
 -    centos8-2   shut off
3.2 在host2上使用图形化工具virt-manager安装虚拟机
# 安装相关包并启动服务
[root@host2 ~]# dnf install qemu-kvm libvirt virt-manager virt-install virt-viewer -y
[root@host2 ~]# systemctl enable --now libvirtd

# 准备镜像文件
[root@host2 ~]# mkdir /data/isos
[root@host2 ~]# ll -h /data/isos
total 1.8G
-rw-r--r-- 1 root root 1.8G Jun 29 15:57 CentOS-8.3.2011-x86_64-minimal.iso

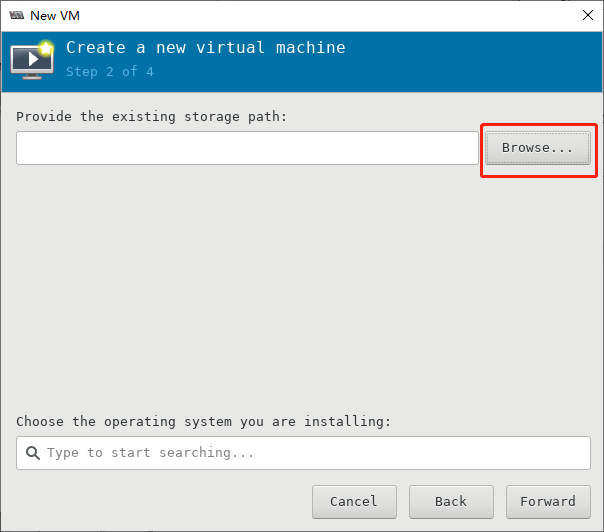
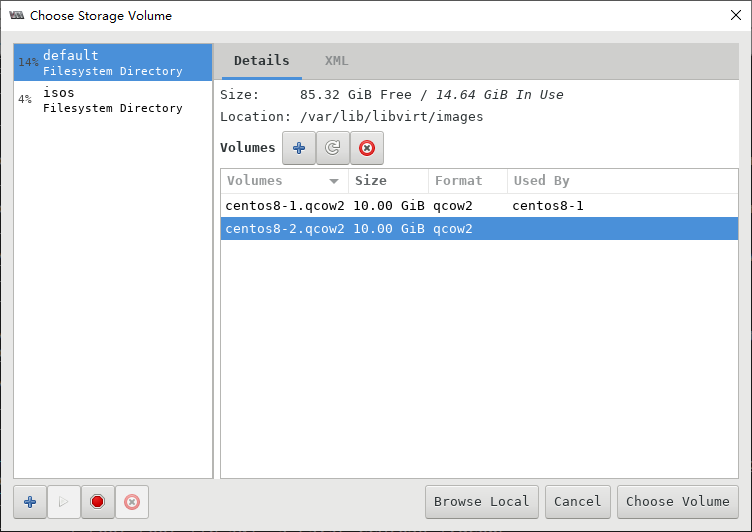
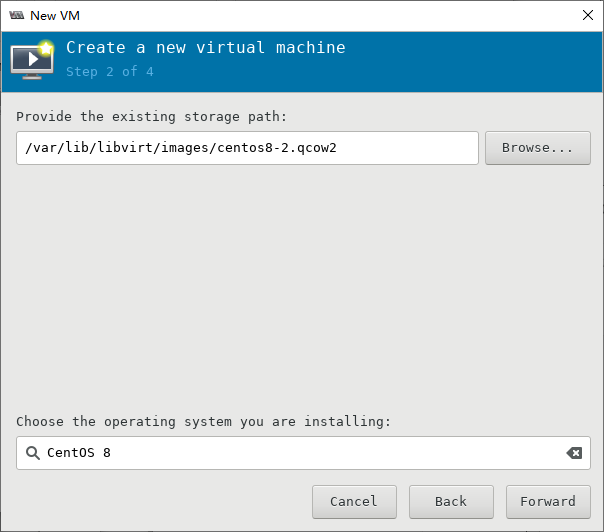
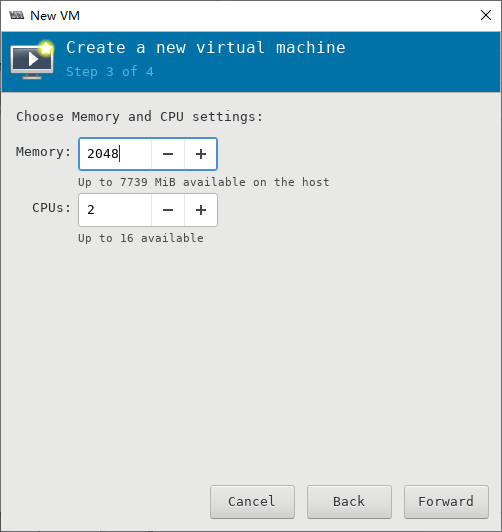
# 利用virt-manager图形工具安装
[root@host2 ~]# export DISPLAY=10.0.0.1:0
[root@host2 ~]# virt-manager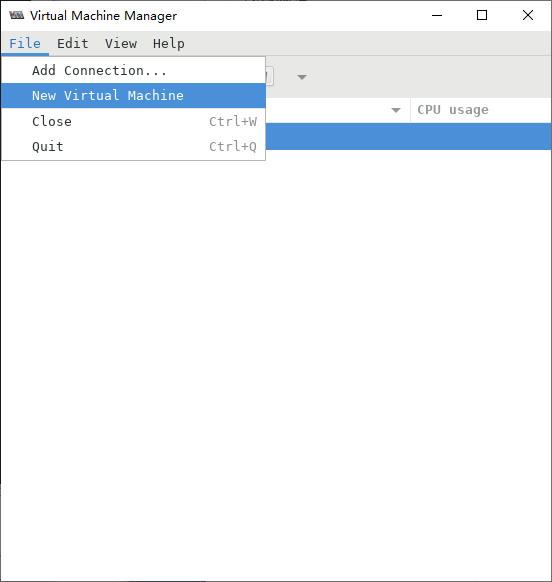
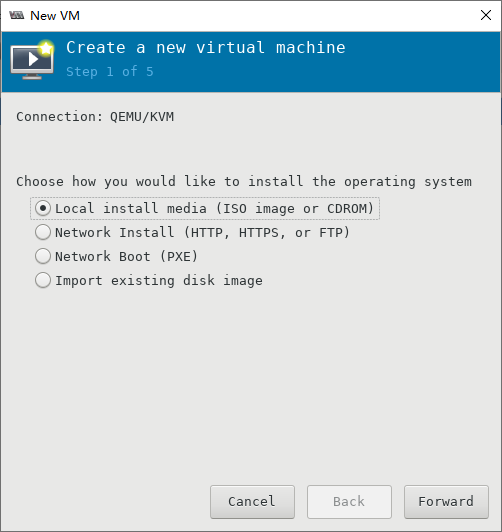
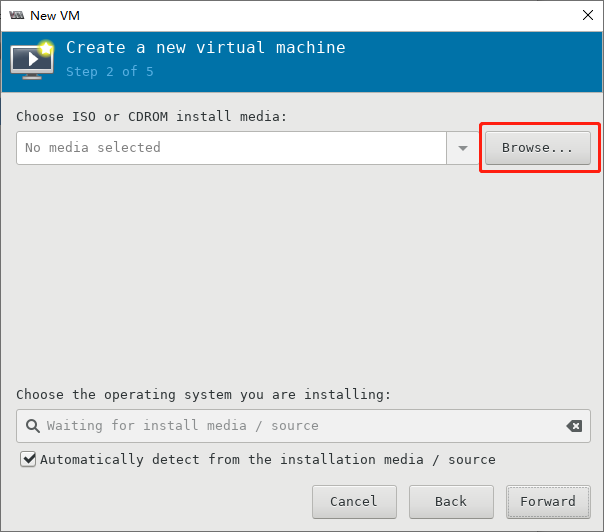
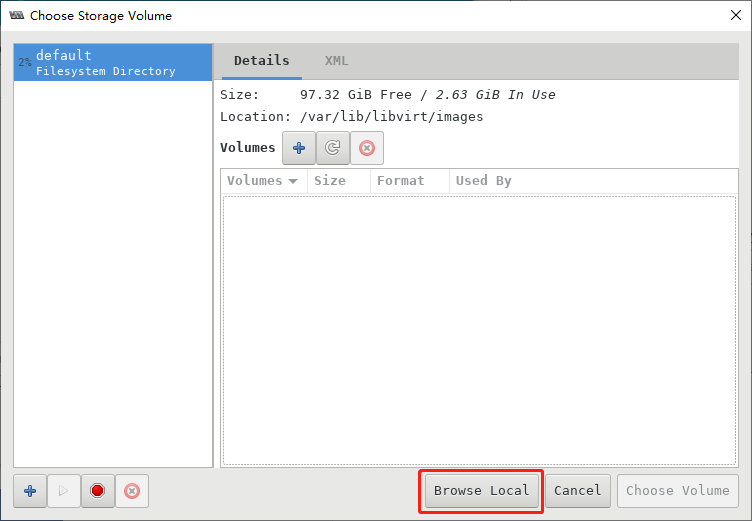
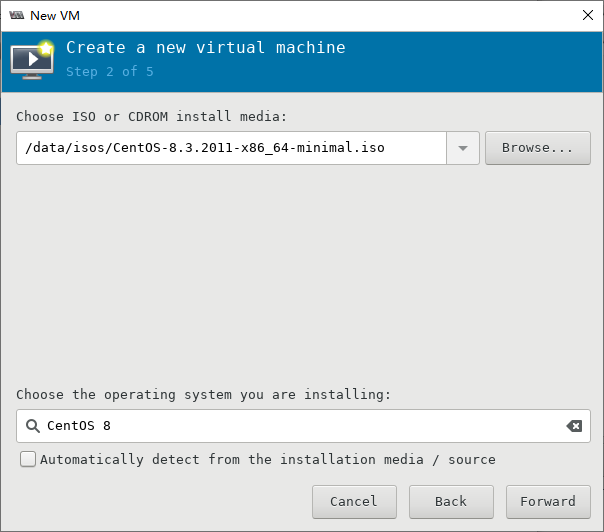
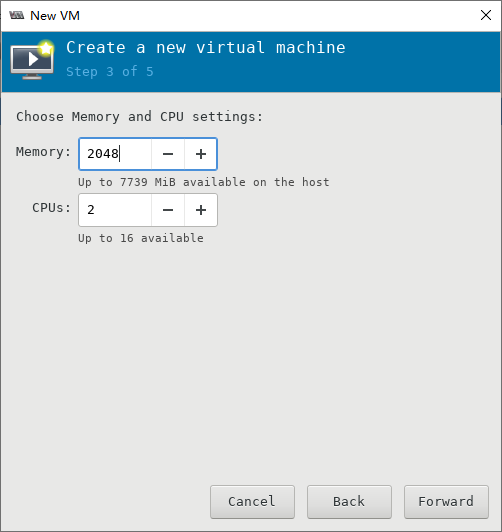
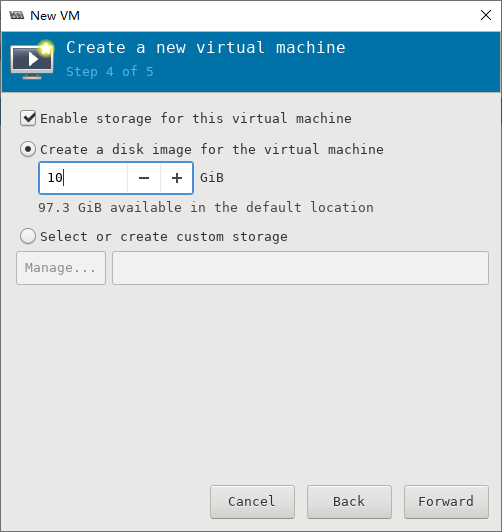
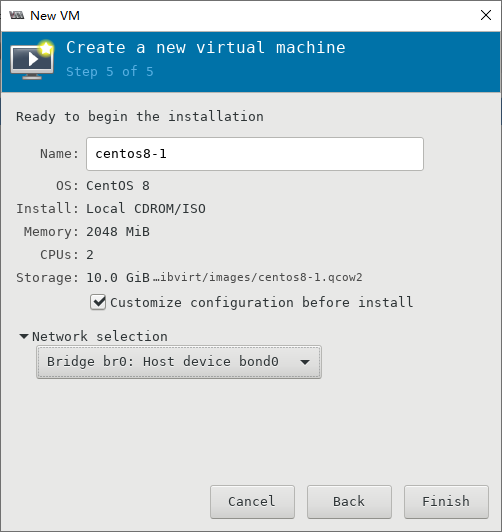
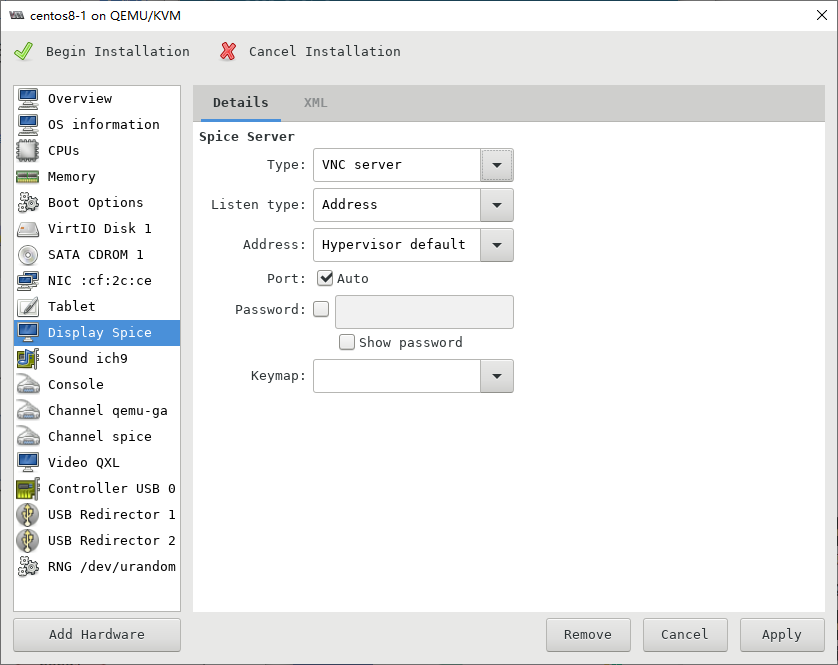
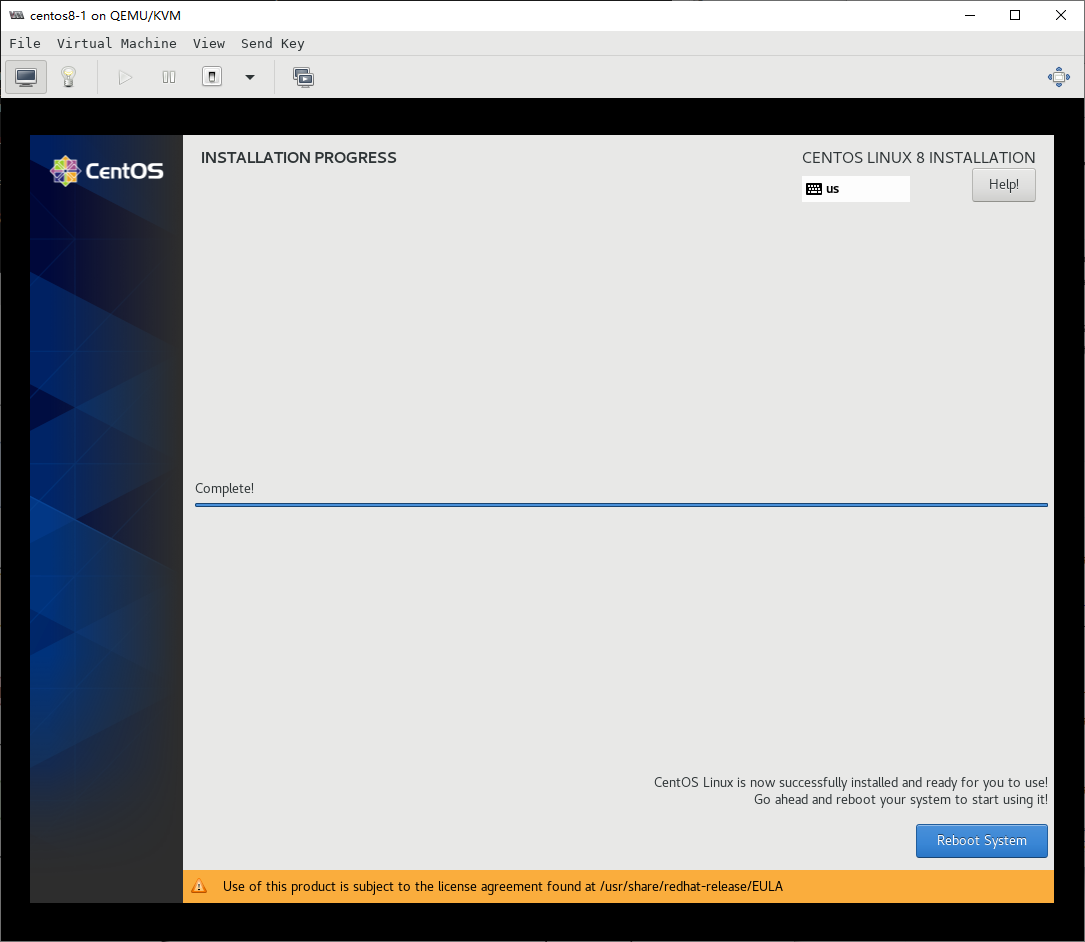
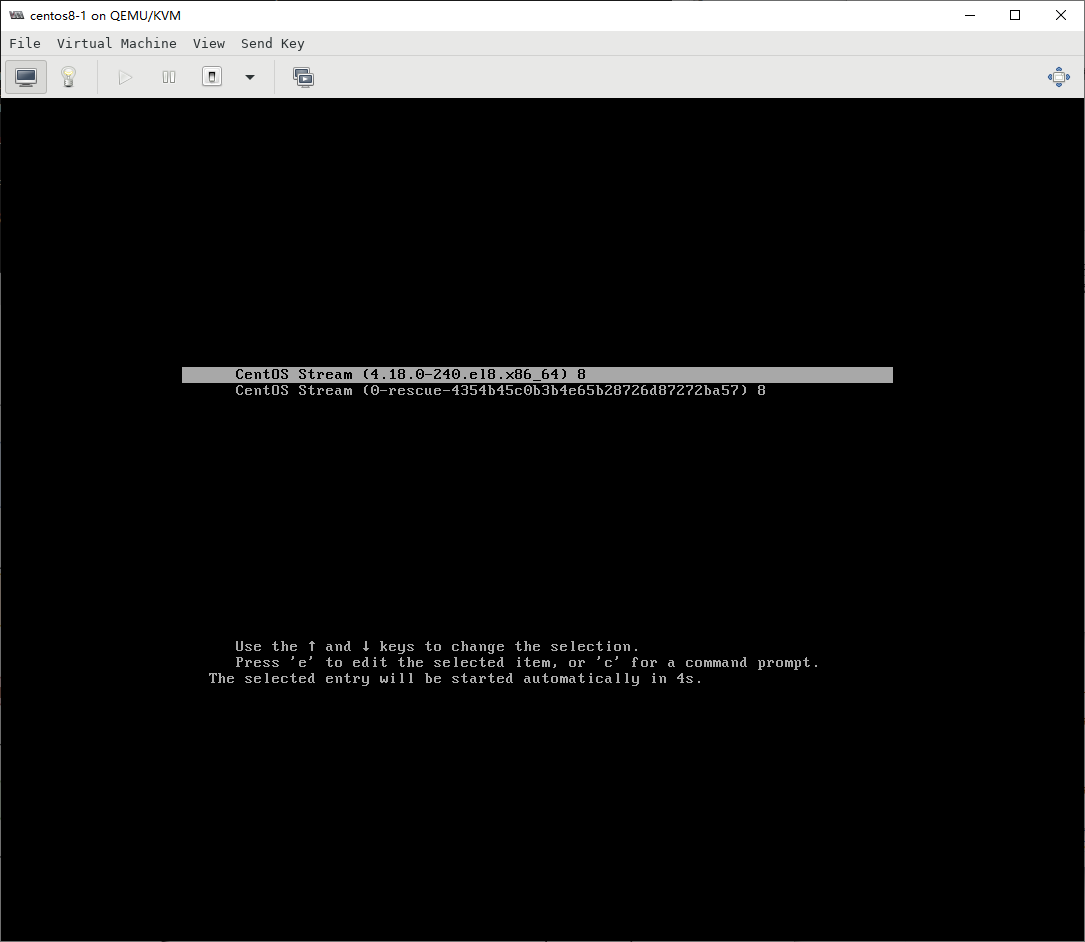
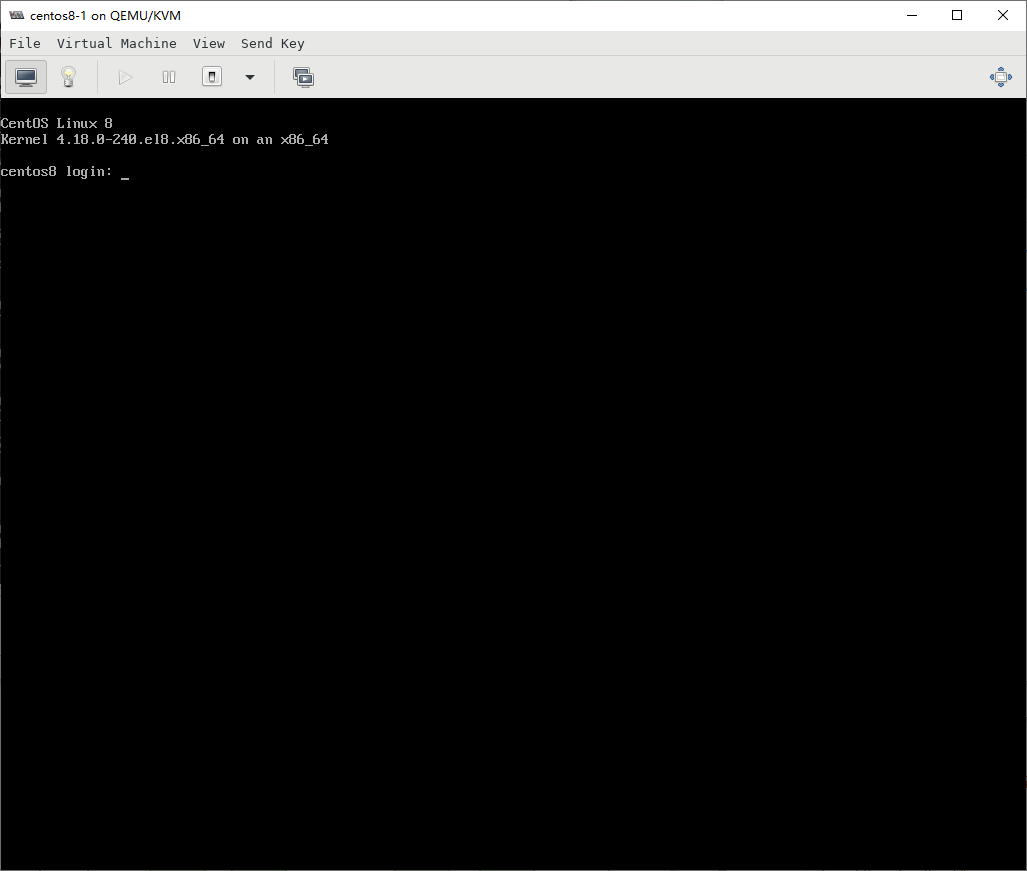
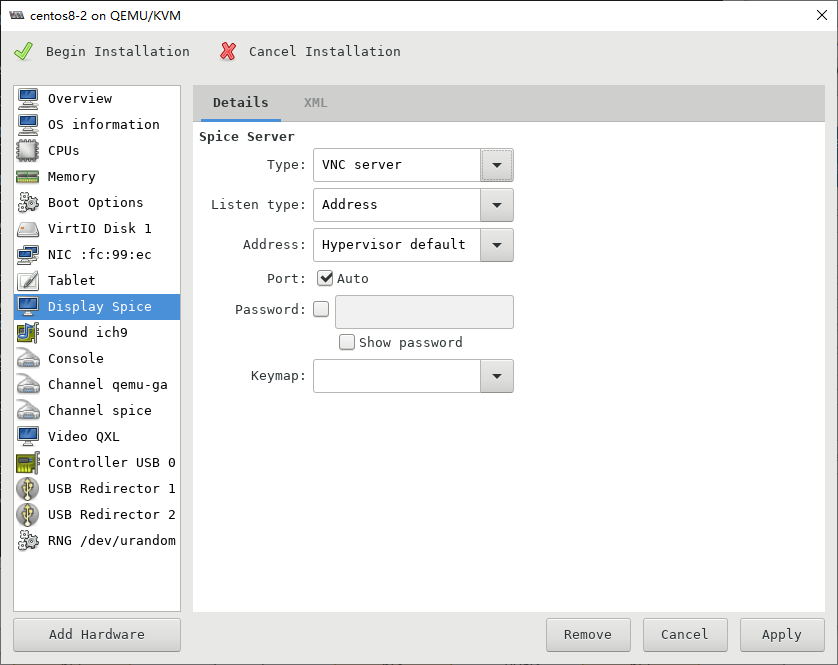
改为VNC server,否则键盘无法输入
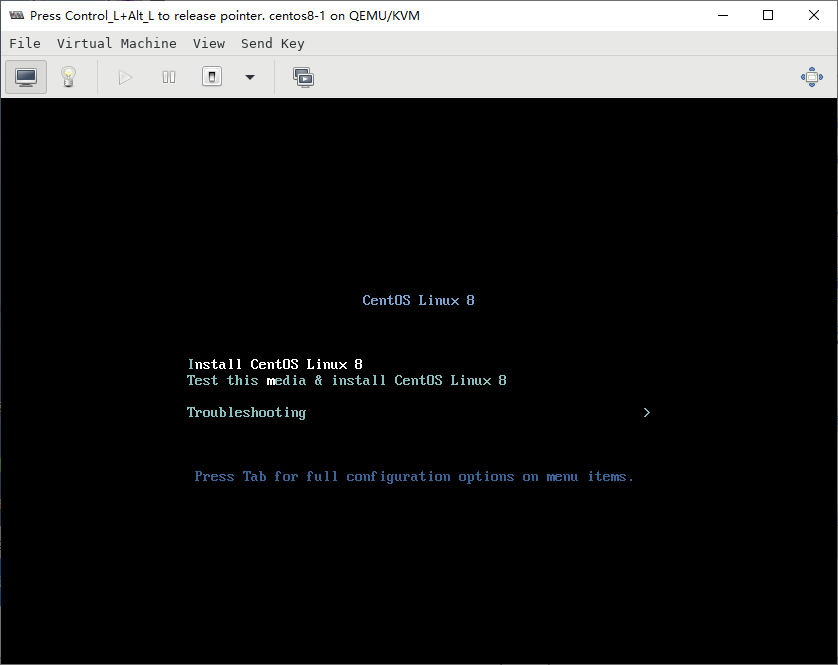
基于vm3安装vm4
[root@host2 ~]# cp /var/lib/libvirt/images/centos8-1.qcow2 /var/lib/libvirt/images/centos8-2.qcow2
[root@host2 ~]# ll -h /var/lib/libvirt/images/
total 23G
-rw------- 1 root root 11G Jul  3 23:52 centos8-1.qcow2
-rw------- 1 root root 11G Jul  3 23:54 centos8-2.qcow2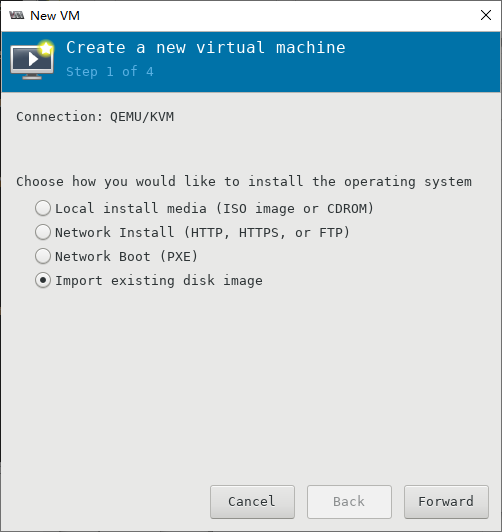
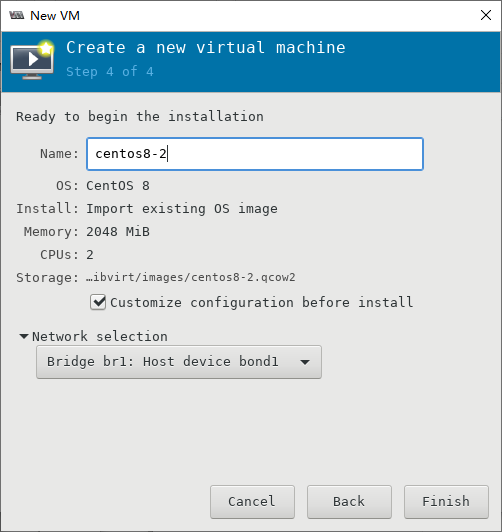
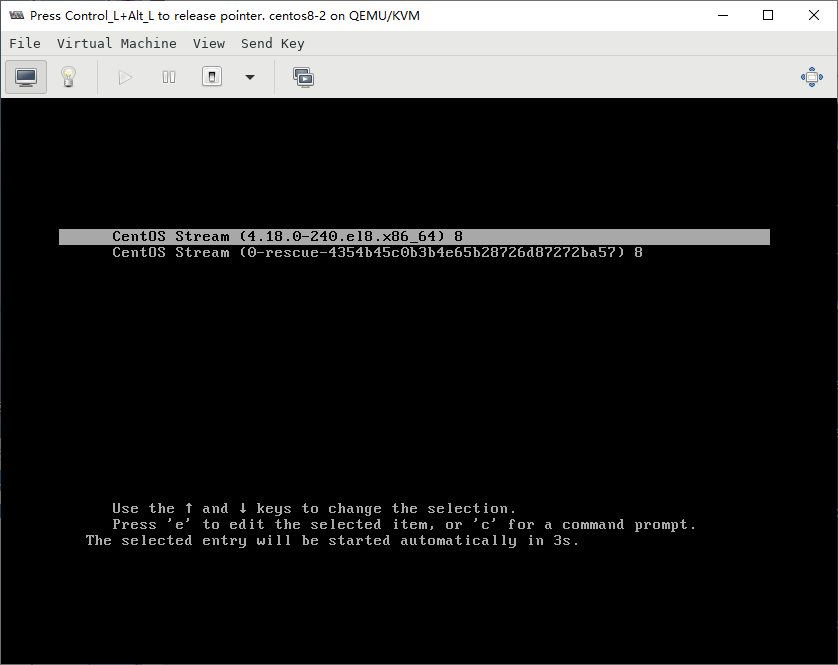
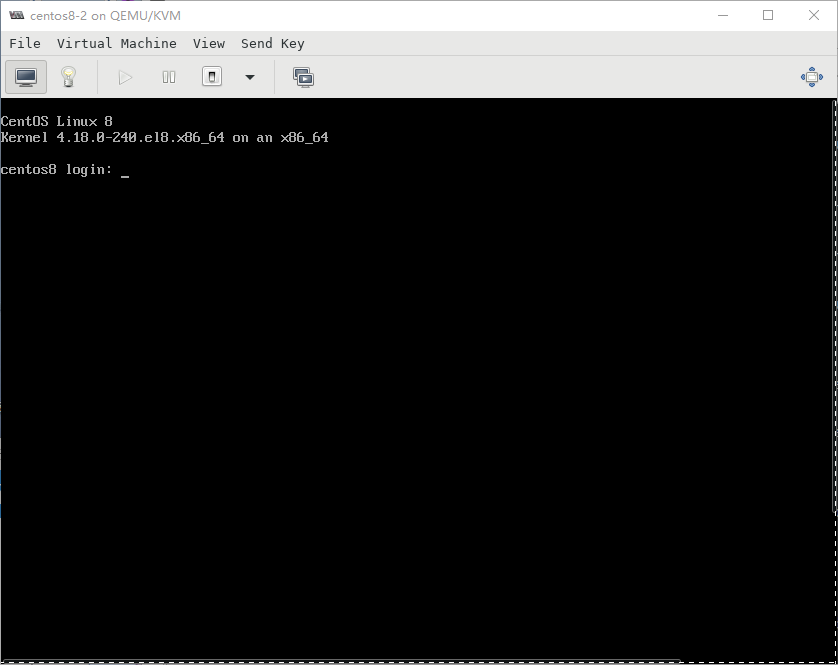
同样改为VNC server
[root@host2 ~]# virsh list --all
 Id   Name        State
----------------------------
 -    centos8-1   shut off
 -    centos8-2   shut off
4 设置虚拟机网络
4.1 设置vm1的网络
# 查看网卡
[root@host1 ~]# virsh domiflist centos8-1
 Interface   Type     Source   Model    MAC
-----------------------------------------------------------
 -           bridge   br0      virtio   52:54:00:5e:84:28

# 添加网卡,加--config参数永久生效
[root@host1 ~]# virsh attach-interface centos8-1 --type bridge --source br1 --config --model virtio
Interface attached successfully

[root@host1 ~]# virsh domiflist centos8-1
 Interface   Type     Source   Model    MAC
-----------------------------------------------------------
 -           bridge   br0      virtio   52:54:00:5e:84:28
 -           bridge   br1      virtio   52:54:00:bf:ec:b2
恢复传统网卡命名

配置vm1的IP
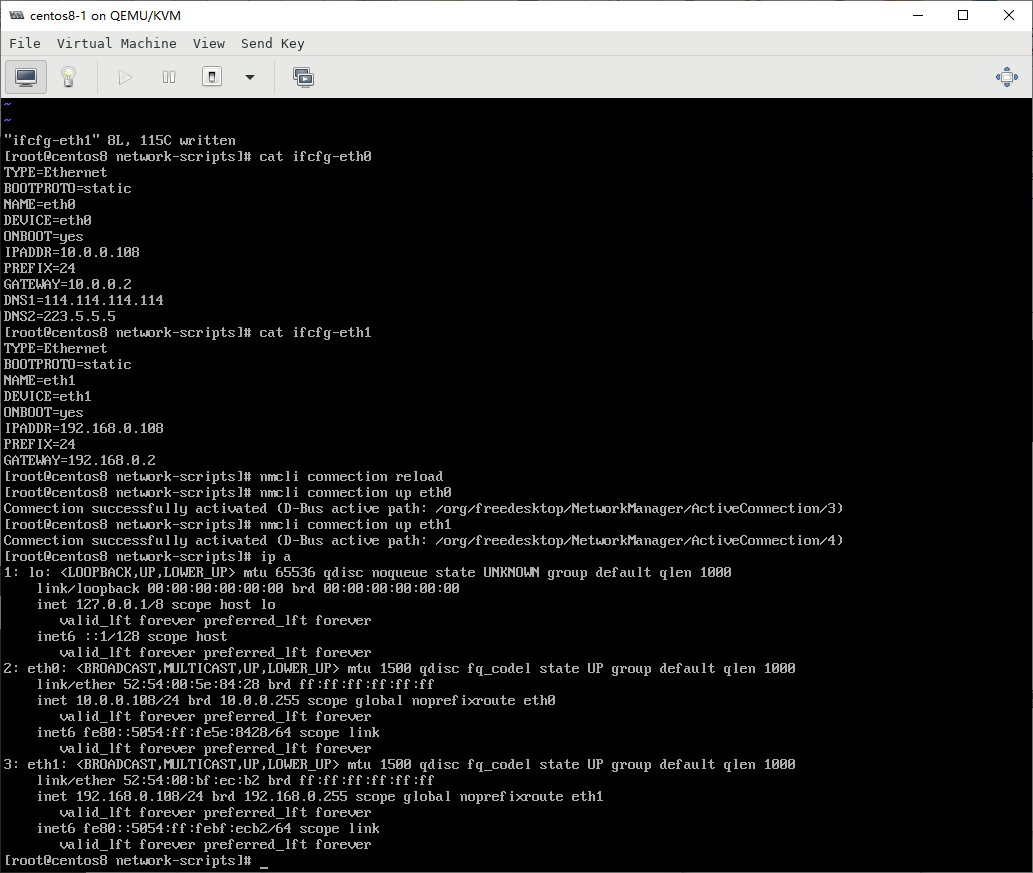
4.2 设置vm3的网络
同样先恢复传统网卡命名
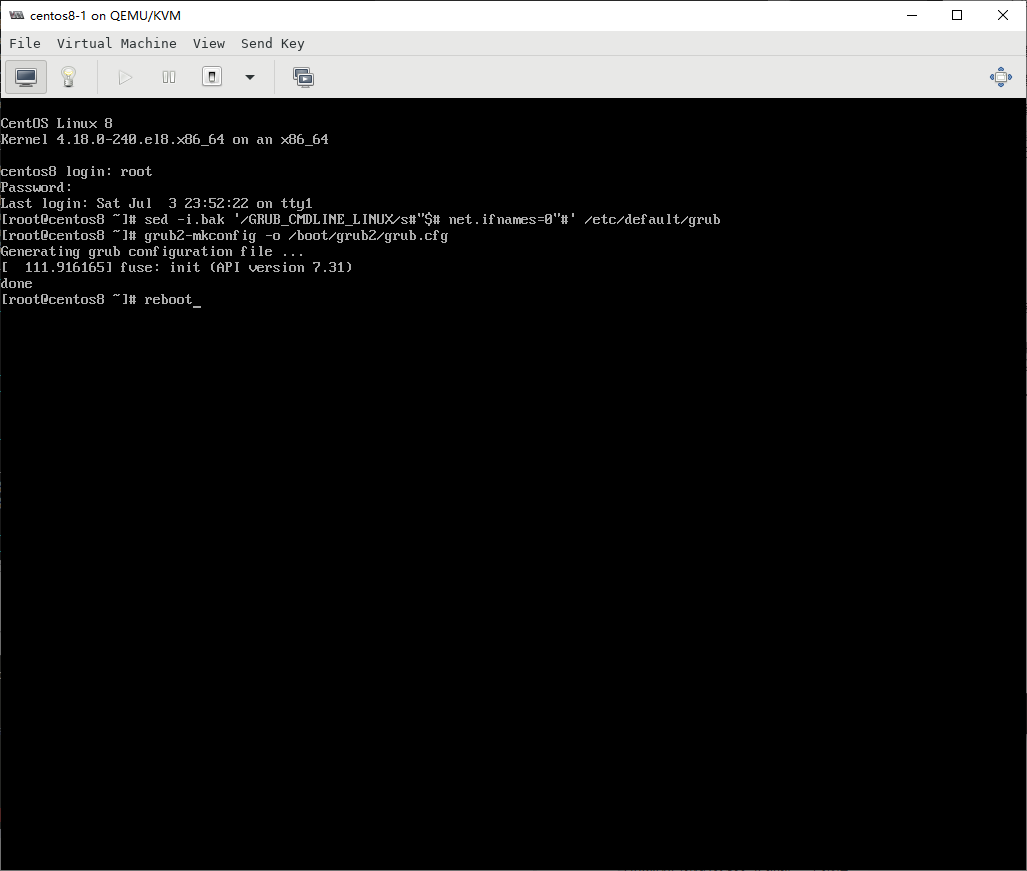
配置vm3的IP
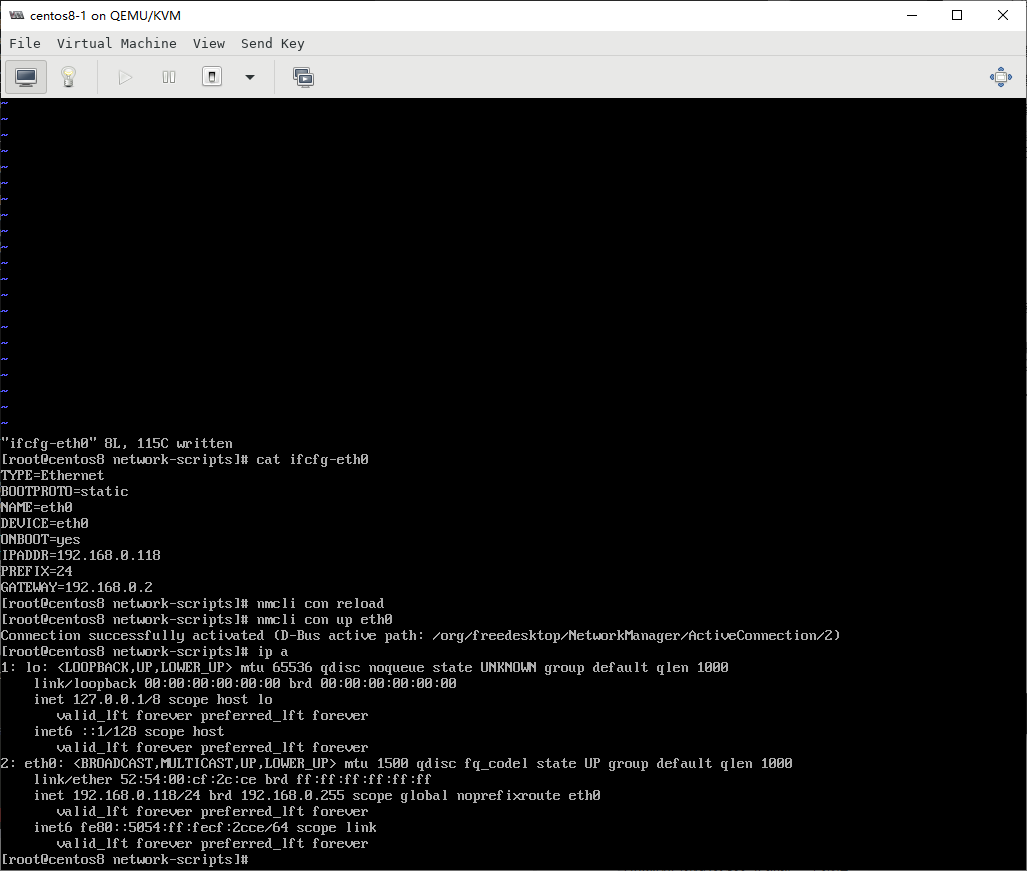
4.3 测试网络的连通性
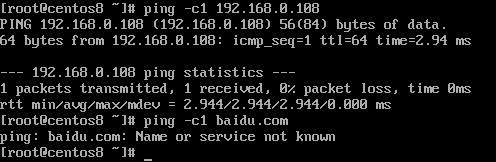
vm1可以上外网,可以上内网
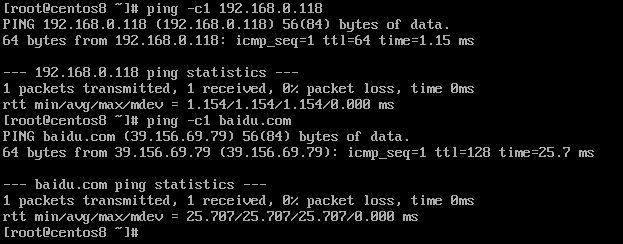
vm3只能上内网
5 搭建LAMP架构
架构图
5.1 在vm1上安装lap服务
[root@vm1 ~]# dnf install httpd php php-json php-mysqlnd tar -y
[root@vm1 ~]# systemctl enable --now httpd
Created symlink /etc/systemd/system/multi-user.target.wants/httpd.service → /usr/lib/systemd/system/httpd.service.
[root@vm1 ~]# ls
anaconda-ks.cfg                              wordpress-5.7.2-zh_CN.tar.gz
mariadb-10.5.10-linux-systemd-x86_64.tar.gz
[root@vm1 ~]# scp mariadb-10.5.10-linux-systemd-x86_64.tar.gz 192.168.0.118:~
root@192.168.0.118's password:
mariadb-10.5.10-linux-systemd-x86_64.tar.gz            100%  334MB  84.8MB/s   00:03

[root@vm1 ~]# tar xvf wordpress-5.7.2-zh_CN.tar.gz
[root@vm1 ~]# mv wordpress /var/www/html/
[root@vm1 ~]# chown -R apache.apache /var/www/html/wordpress
5.2 在vm3上安装mysql服务
因为vm3为内网机器,需要离线安装
注意:禁用firewalld和禁用selinux!!!
# 从vm1下载所需rpm包
[root@vm1 ~]# yum install yum-utils -y
[root@vm1 ~]# yumdownloader tar libaio ncurses-compat-libs
[root@vm1 ~]# scp tar-1.30-5.el8.x86_64.rpm libaio-0.3.112-1.el8.x86_64.rpm ncurses-compat-libs-6.1-7.20180224.el8.x86_64.rpm 192.168.0.118:~
root@192.168.0.118's password:
tar-1.30-5.el8.x86_64.rpm                              100%  838KB  14.6MB/s   00:00
libaio-0.3.112-1.el8.x86_64.rpm                        100%   33KB  10.7MB/s   00:00
ncurses-compat-libs-6.1-7.20180224.el8.x86_64.rpm      100%  331KB  14.3MB/s   00:00

# 安装rpm包
[root@vm3 ~]# ls
anaconda-ks.cfg
libaio-0.3.112-1.el8.x86_64.rpm
mariadb-10.5.10-linux-systemd-x86_64.tar.gz
ncurses-compat-libs-6.1-7.20180224.el8.x86_64.rpm
tar-1.30-5.el8.x86_64.rpm
[root@vm3 ~]# rpm -ivh tar-1.30-5.el8.x86_64.rpm
warning: tar-1.30-5.el8.x86_64.rpm: Header V3 RSA/SHA256 Signature, key ID 8483c65d: NOKEY
Verifying...                          ################################# [100%]
Preparing...                          ################################# [100%]
Updating / installing...
   1:tar-2:1.30-5.el8                 ################################# [100%]
[root@vm3 ~]# rpm -ivh libaio-0.3.112-1.el8.x86_64.rpm
warning: libaio-0.3.112-1.el8.x86_64.rpm: Header V3 RSA/SHA256 Signature, key ID 8483c65d: NOKEY
Verifying...                          ################################# [100%]
Preparing...                          ################################# [100%]
        package libaio-0.3.112-1.el8.x86_64 is already installed
[root@vm3 ~]# rpm -ivh ncurses-compat-libs-6.1-7.20180224.el8.x86_64.rpm
warning: ncurses-compat-libs-6.1-7.20180224.el8.x86_64.rpm: Header V3 RSA/SHA256 Signature, key ID 8483c65d: NOKEY
Verifying...                          ################################# [100%]
Preparing...                          ################################# [100%]
Updating / installing...
   1:ncurses-compat-libs-6.1-7.2018022################################# [100%]

[root@vm3 ~]# useradd -r -s /sbin/nologin mysql
[root@vm3 ~]# tar xvf mariadb-10.5.10-linux-systemd-x86_64.tar.gz
[root@vm3 ~]# mv mariadb-10.5.10-linux-systemd-x86_64 /usr/local/
[root@vm3 ~]# ln -s /usr/local/mariadb-10.5.10-linux-systemd-x86_64/ /usr/local/mysql
[root@vm3 ~]# chown -R mysql.mysql /usr/local/mysql/
[root@vm3 ~]# mkdir -pv /data/mysql
mkdir: created directory '/data'
mkdir: created directory '/data/mysql'
[root@vm3 ~]# chown -R mysql.mysql /data/mysql
[root@vm3 ~]# mkdir -pv /etc/mysql
mkdir: created directory '/etc/mysql'
[root@vm3 ~]# cp /usr/local/mysql/support-files/wsrep.cnf /etc/mysql/my.cnf
[root@vm3 ~]# vi /etc/mysql/my.cnf
[mysqld]
datadir=/data/mysql
skip_name_resolve=on
log-bin
[root@vm3 ~]# echo 'PATH=/usr/local/mysql/bin/:$PATH' > /etc/profile.d/mysql.sh
[root@vm3 ~]# . /etc/profile.d/mysql.sh
[root@vm3 ~]# cd /usr/local/mysql/
[root@vm3 mysql]# scripts/mysql_install_db --user=mysql --datadir=/data/mysql
[root@vm3 mysql]# cp support-files/mysql.server /etc/rc.d/init.d/mysqld
[root@vm3 mysql]# cp support-files/systemd/mariadb.service /usr/lib/systemd/system/
[root@vm3 mysql]# systemctl daemon-reload
[root@vm3 mysql]# systemctl enable --now mariadb.service
Created symlink /etc/systemd/system/multi-user.target.wants/mariadb.service → /usr/lib/systemd/system/mariadb.service.

# 创建wordpress数据库和用户
[root@vm3 ~]# mysql
MariaDB [(none)]> create database wordpress;
Query OK, 1 row affected (0.000 sec)

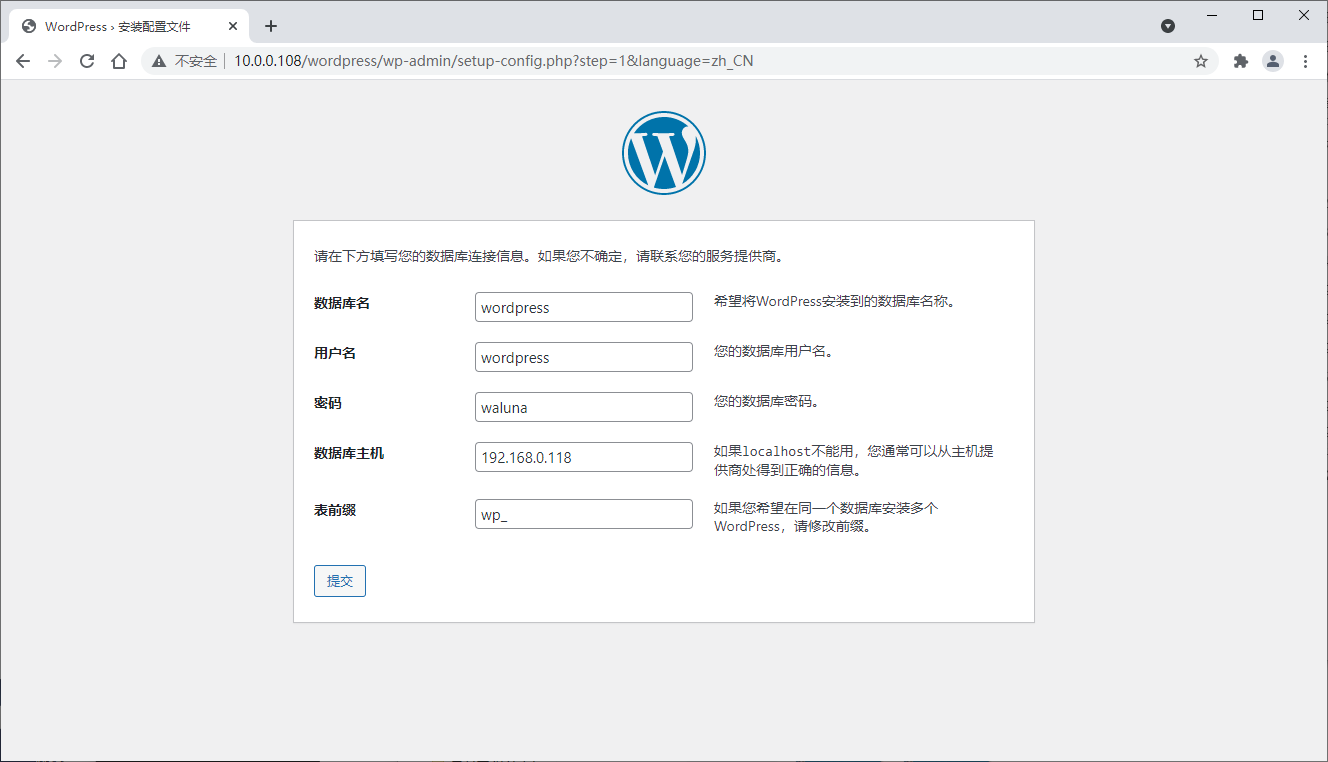
MariaDB [(none)]> grant all on wordpress.* to wordpress@'192.168.0.108' identified by 'waluna';
Query OK, 0 rows affected (0.012 sec)

MariaDB [(none)]> flush privileges;
Query OK, 0 rows affected (0.001 sec)

MariaDB [(none)]> \q
Bye
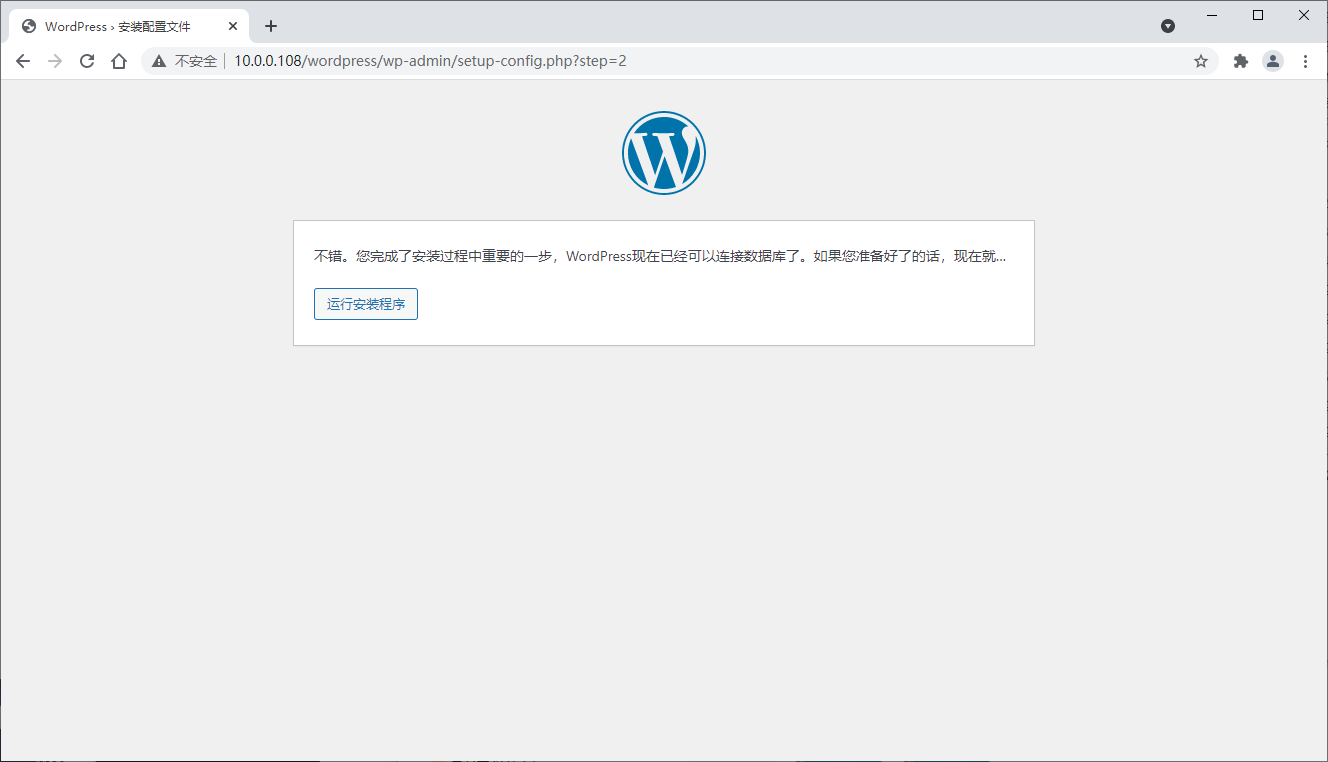
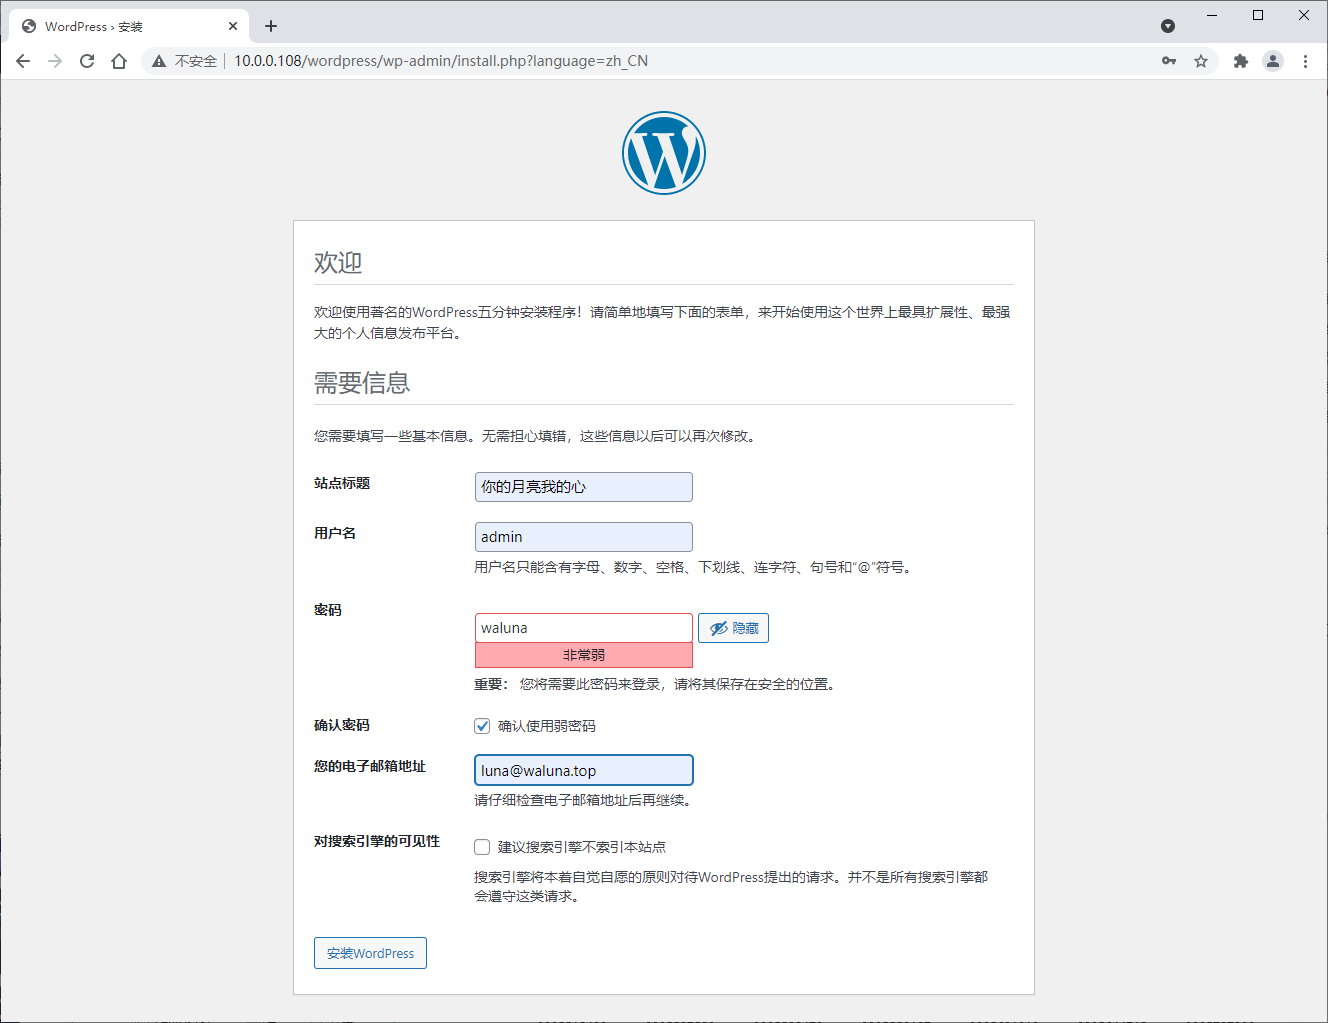
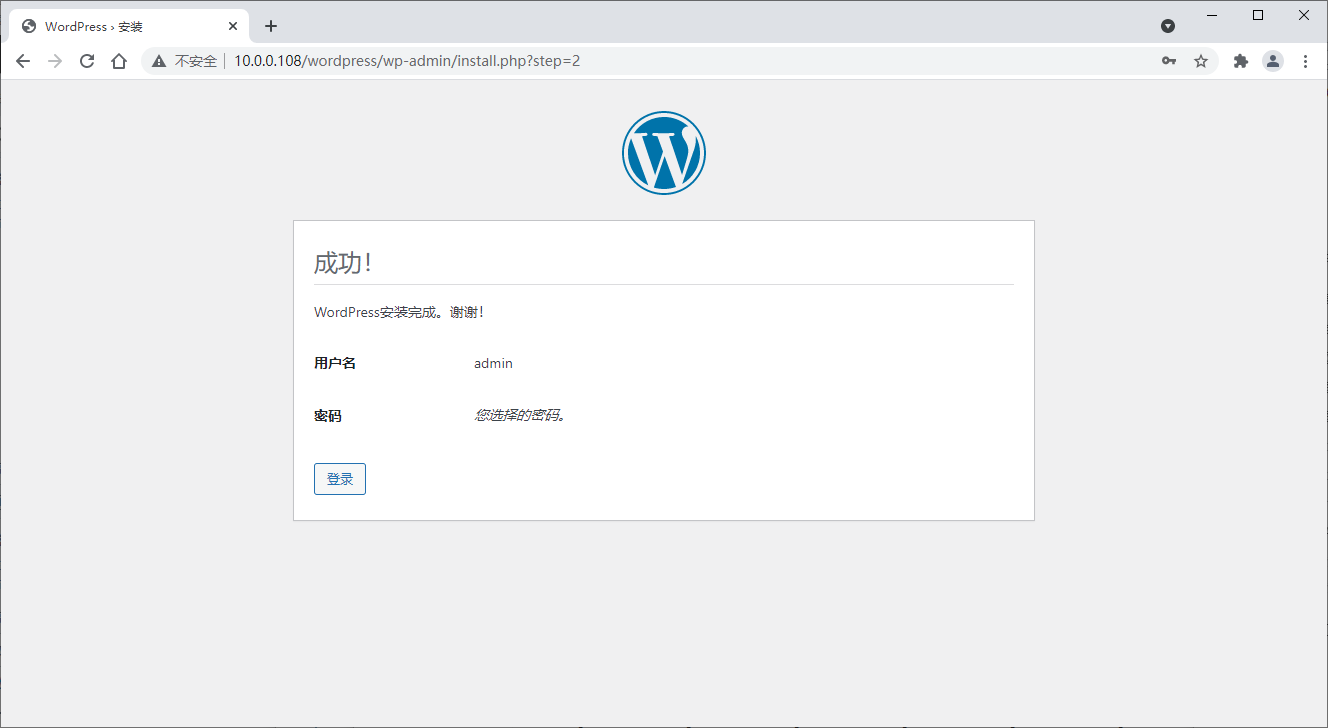
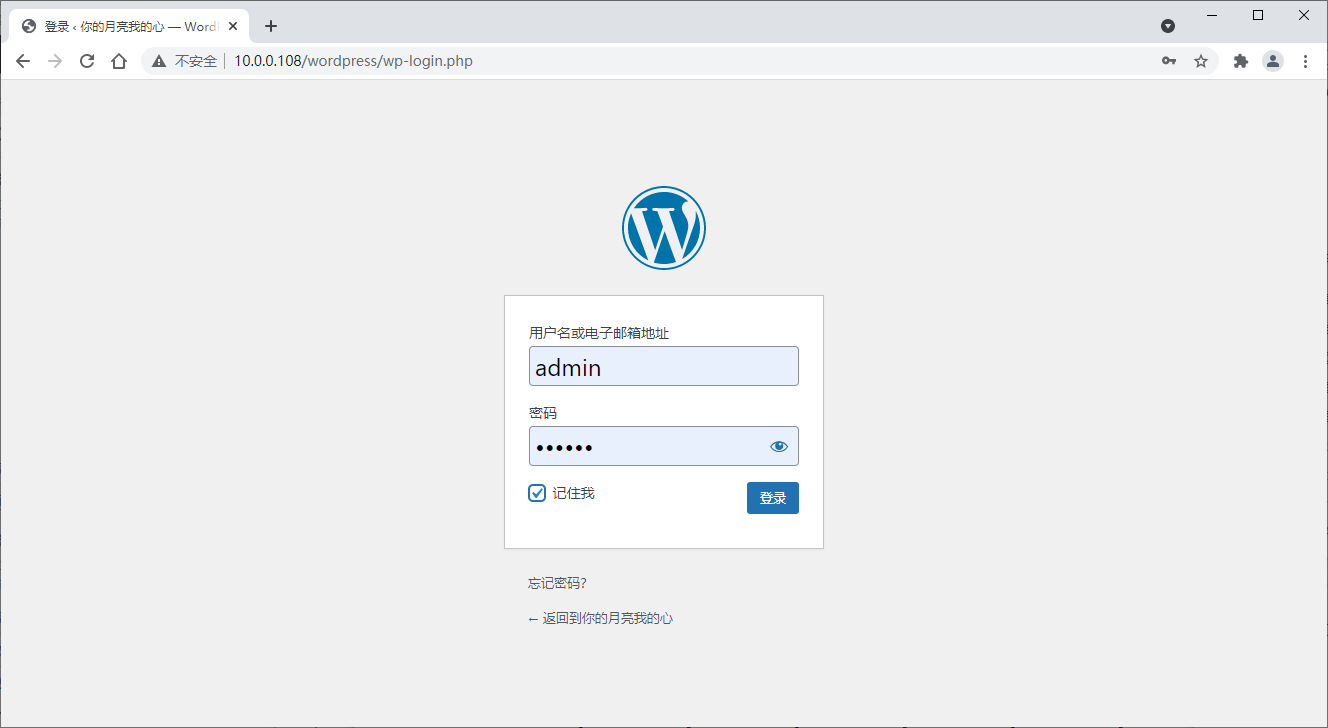
5.3 初始化wordpress
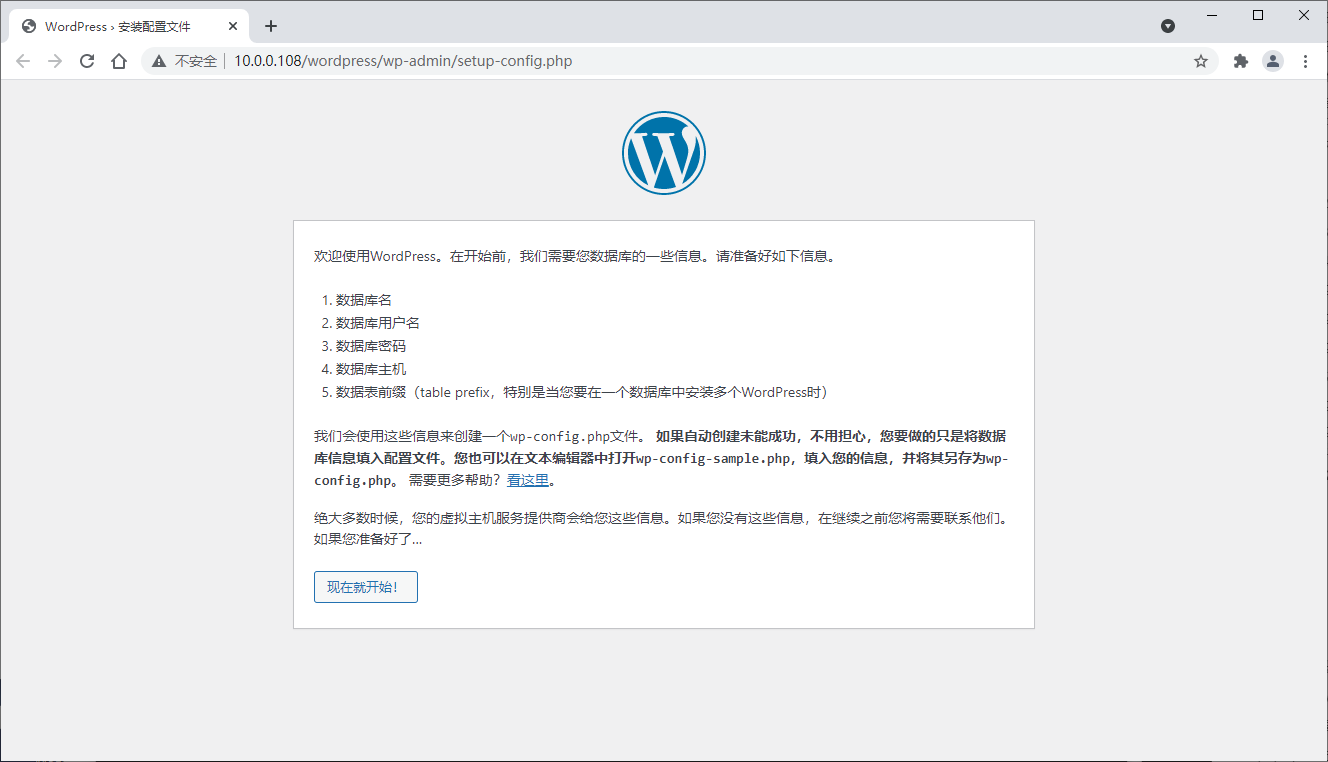
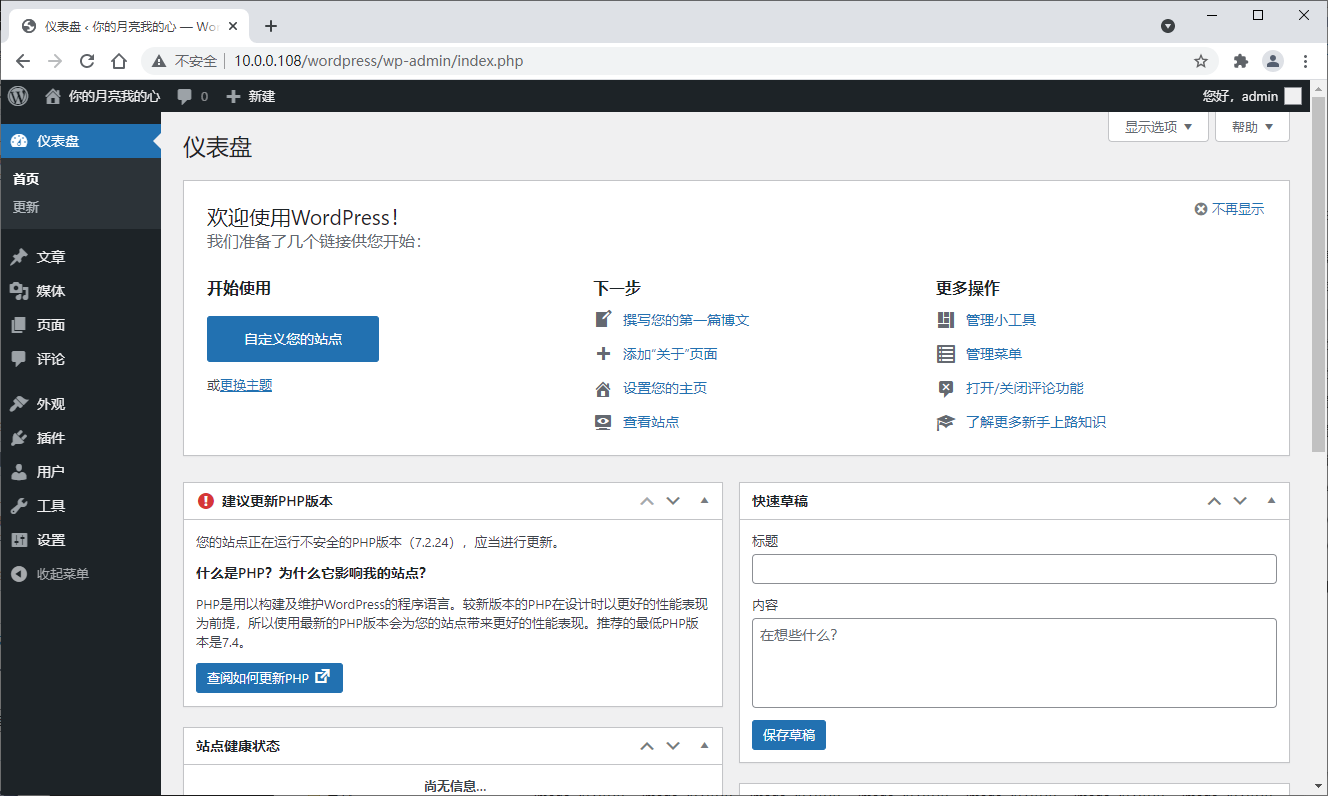
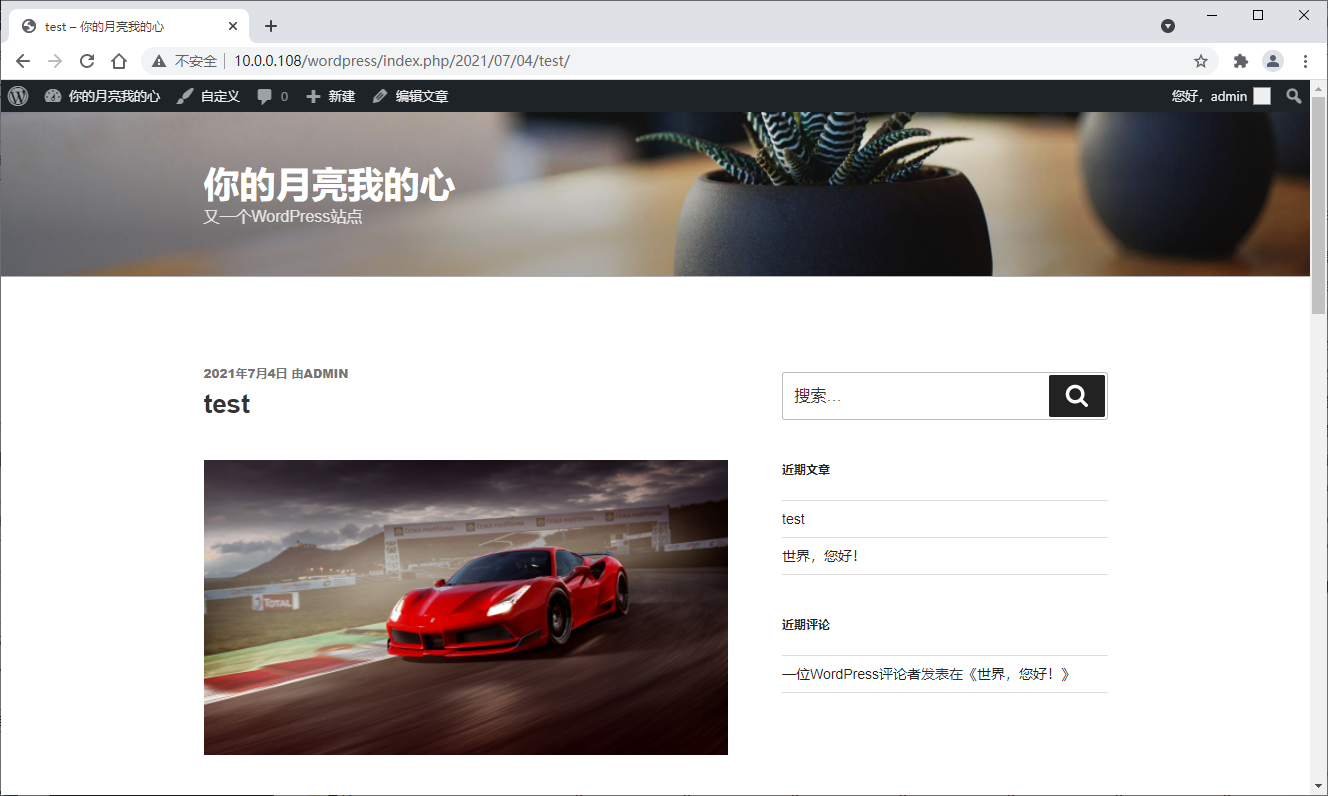
用浏览器访问:http://10.0.0.108/wordpress
Comments | NOTHING